
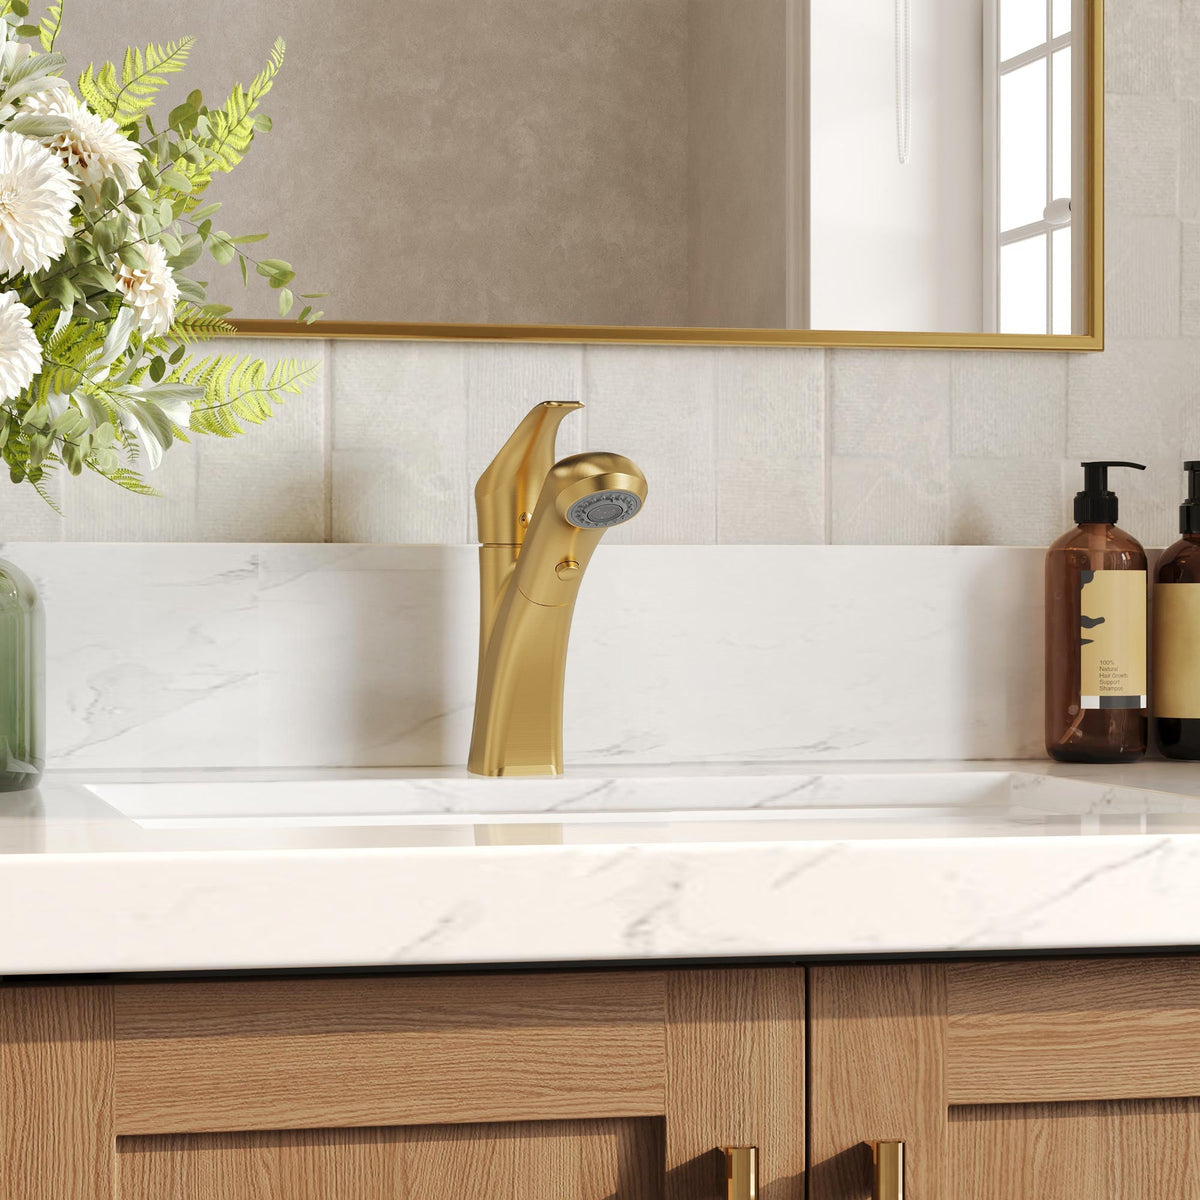
The secret to keeping brass faucets looking their best is surprisingly simple: use gentle, pH-neutral cleaners for day-to-day cleaning and mild acids for tarnish. The real trick is knowing what not to do—harsh abrasives are the enemy, as they can permanently ruin the finish. This approach is all about preserving the beauty and value of your fixtures, ensuring they remain a stunning focal point for years.
Why Proper Brass Faucet Care Matters
Brass fixtures add a certain timeless elegance to a kitchen or bathroom. They have a classic look that’s hard to beat, combining visual appeal with serious durability. But keeping that brilliant shine takes more than just a quick wipe with a damp cloth.
Learning how to clean brass faucets the right way isn't just about appearances; it’s about protecting a significant investment in your home. This guide gets straight to the point, offering practical techniques that actually work for different brass finishes. Proper care keeps your faucets looking great and functioning perfectly, helping you avoid the kind of damage that leads to expensive replacements.
The Value of Brass in Your Home
When you choose brass, you're getting more than just a pretty fixture. Homeowners are increasingly looking for materials that deliver on both durability and design. Brass fits that bill perfectly, but it also has a hidden benefit many people don't even know about.
Thanks to its high copper content, brass has certain antimicrobial properties. Many copper alloys are recognized by the U.S. Environmental Protection Agency as antimicrobial materials, providing a hygiene advantage in high-touch bathroom areas. In a high-traffic spot like a bathroom, where faucet handles are touched constantly, this built-in benefit offers real value and peace of mind.
A well-maintained brass faucet isn't just a functional fixture; it's a design statement that evolves with your home. Embracing its character—whether you prefer a brilliant shine or a soft patina—is the key to long-term satisfaction.
Preserving Your Investment and Style
At the end of the day, learning the right cleaning methods helps you steer clear of common mistakes that can permanently damage your faucet's finish. It’s easy to grab the wrong product—like an abrasive scouring pad or a harsh chemical cleaner—and accidentally strip a protective lacquer or scratch the metal itself.
By following a few simple rules, you can maintain your faucet’s integrity and appearance for the long haul. This guide will give you the knowledge you need to handle everything from daily wipe-downs to tackling stubborn tarnish, ensuring your brass fixtures continue to elevate your home for years to come.
Identifying Your Brass Faucet Finish
Before a single drop of cleaner touches your faucet, you have to figure out exactly what you're working with. Is it lacquered or unlacquered? This one detail changes everything about how you'll clean it. Getting this wrong can lead to irreversible damage, turning a simple maintenance task into a costly mistake.
Lacquered brass is sealed with a clear, protective coating to stop it from oxidizing, keeping it looking shiny and new. Unlacquered brass, on the other hand, is what we call a "living finish." It’s raw, unsealed, and designed to age naturally, developing a beautiful, unique patina as it reacts with its environment over time.
Lacquered Brass: The Shiny Protector
If your faucet is lacquered, think of it as the lower-maintenance option. The lacquer is a shield, and your job is simply to clean that shield—not the actual metal underneath.
These faucets have a consistent, glossy look that doesn't change. The color is uniform across the entire fixture, and it won't tarnish. For this reason, cleaning lacquered brass is usually just a matter of using mild soap and water. Anything more aggressive can scratch, dull, or even strip that protective coating. Once the lacquer is compromised, the brass underneath is exposed to air and will start to tarnish unevenly.
The goal with lacquered brass is preservation. You're cleaning the protective coat, not the metal itself. Gentle handling with soft cloths and mild cleaners is absolutely crucial to keep that seal intact.
Unlacquered Brass: The Evolving Classic
Unlacquered brass offers a dynamic, evolving beauty that many people love, especially in historic or traditionally styled homes. This "living finish" darkens and develops a rich, warm patina, telling a story of its use and age. Its appearance is often less uniform, showing subtle variations in tone and luster.
If your faucet has dark spots, slight color shifts, or a muted, antique look, you’re almost certainly dealing with unlacquered brass. With this type, you have a choice: embrace the natural aging process and its unique character, or periodically polish it back to its original, brilliant shine.
So, how can you be sure which one you have? Here are a couple of simple tests.
Look Closely: A high-gloss, perfectly even shine that looks permanently polished is a dead giveaway for lacquer. If you see varied tones, dark spots, or a softer, aged appearance, it's almost certainly unlacquered.
Try the Polish Test: Find an inconspicuous spot on the faucet, like the underside of the handle. Dab a tiny bit of brass polish on a soft cloth and give it a gentle rub. If the cloth turns black, you've got unlacquered brass. If the cloth stays clean, the faucet is lacquered.
Once you’ve confidently identified the finish, you’re ready to move on to the right cleaning methods that will keep your brass faucet looking fantastic for years.
DIY Brass Cleaning Solutions Straight from Your Pantry
You don't need a cabinet full of harsh chemicals to get your brass faucets looking their best. In fact, some of the most effective and safest cleaners are probably already sitting in your kitchen. These simple, homemade solutions are gentle on your fixtures, easy on your wallet, and do a fantastic job of bringing back that original luster.
Before you jump in, here's a crucial piece of advice: always test your cleaning solution on a small, hidden spot first. A quick dab on the back of the faucet base is perfect. This little step takes seconds but can save you from accidentally damaging the finish, giving you the green light to clean with confidence. And always, always use a soft microfiber cloth to avoid creating tiny scratches.
The Go-To: Lemon Juice and Baking Soda Paste
For tackling moderate tarnish on unlacquered brass, a simple paste of lemon juice and baking soda works well. It’s effective for occasional use on stubborn spots, but stick to mild soap for daily cleaning.
Whip up the paste: Just mix equal parts baking soda and fresh lemon juice. You're looking for a thick consistency that's easy to spread.
Apply and let it work: Use your fingers or a soft cloth to apply the paste, focusing a little extra on any tarnished spots. Give it about 10-15 minutes to do its thing.
Rinse and buff: Wash it all off with warm water until no residue remains. The final, most important step is to dry it immediately and buff it with a clean microfiber cloth to a beautiful shine.
Ketchup: The Surprise Tarnish Buster
This one might raise some eyebrows, but ketchup can help against stubborn tarnish on unlacquered brass. The magic comes from the mild acids in the tomatoes and vinegar, which are suitable for occasional breakdown of oxidation.
It’s actually simple science. Tarnish is just the result of the copper in the brass alloy reacting with air. The gentle acids in household items dissolve this top layer of oxidation. Apply ketchup, let it sit for 10-15 minutes, then rinse thoroughly. Use sparingly to avoid stripping desired patina.
A Pro Tip from Experience: For those tricky spots around the handles or at the very base of the faucet, an old toothbrush is your best friend. Just dip it in your cleaning paste and give those crevices a gentle scrub to get rid of any stubborn buildup.
Tackling Hard Water Stains with Vinegar
If your problem is less about tarnish and more about those chalky white spots from hard water, white vinegar is the answer. The acetic acid it contains is fantastic for dissolving mineral deposits like calcium and magnesium.
Prep your solution: Mix equal parts white vinegar and water. Soak a soft cloth or a few paper towels in the mixture until they're fully saturated.
Wrap the affected area: Drape or wrap the soaked cloth directly onto the parts of the faucet with mineral buildup. Let it sit for at least an hour—this gives the vinegar time to break down the deposits. For unlacquered brass, limit to 30 minutes and test first.
A little scrub and a final rinse: After the time is up, remove the cloth and use a soft-bristled brush to gently scrub the loosened deposits away. Rinse the entire faucet with clean water and dry it thoroughly with your microfiber cloth.
Using these kitchen staples, you can keep your brass faucets looking incredible without ever having to reach for an expensive or potentially damaging commercial cleaner.
Your Guide to Deep Cleaning and Polishing
Sometimes a simple wipe-down just won't cut it. When your brass faucet starts looking dull, tired, or tarnished, it's time for a proper deep clean to bring back its original warmth and luster. This isn't just about surface grime; we're talking about tackling tarnish, getting rid of mineral buildup, and even cleaning out the often-ignored aerator.
With the right game plan, you can get a truly professional result that makes your faucet shine like new.
Before you jump in, it's a good idea to get all your tools ready. Having everything at your fingertips from the start makes the whole process go much smoother and prevents any mishaps, like leaving a cleaning solution on for too long.
Your Brass Faucet Care Toolkit
| Item | Purpose | Best For |
|---|---|---|
| Soft Microfiber Cloths | Cleaning, drying, and buffing without scratching. | All brass finishes |
| Small, Soft-Bristled Brush | Scrubbing tight crevices and detailed areas. | Unlacquered brass, handle bases |
| DIY or Commercial Cleaner | Removing tarnish and stubborn buildup. | Specific to finish type (unlacquered) |
| Adjustable Wrench | Safely removing the faucet aerator. | Aerator maintenance |
| Small Bowl | Soaking the aerator to dissolve mineral deposits. | Restoring water pressure |
| White Vinegar | A natural descaler for aerator cleaning. | Mineral and calcium buildup |
Having these items organized will make the cleaning process efficient and effective, ensuring you get the best possible results without any last-minute scrambling.
The Deep Cleaning Process
First things first, give the faucet a gentle pre-clean. Just dampen a microfiber cloth with warm water and a tiny drop of mild dish soap. Wipe down the entire fixture to get rid of any loose dust, fingerprints, or surface grime. This quick step clears the way so your main cleaner can get right to work on the tough stuff.
Now, it’s time to apply your cleaning solution. Whether you're using a commercial product or a homemade paste, spread it evenly across the faucet's surface. Make sure to put a little extra on any spots that look particularly tarnished. Let it sit for 10-15 minutes—this is where the magic happens, as the cleaner breaks down the oxidation.
While the solution is doing its thing, grab that small, soft-bristled brush. This is your secret weapon for all those hard-to-reach places. Gently work the bristles into the grooves around the base, the joints of the handles, and any decorative etching. Buildup loves to hide in these spots, and cleaning them makes a huge difference.
After the time is up, rinse the faucet completely with warm water. You want to be sure no residue is left behind, as it could continue to react with the metal. Then comes the most important part: drying. Use a clean, dry microfiber cloth and buff the surface in soft, circular motions. This prevents water spots from forming and really brings out that brilliant, streak-free shine.
Each of these household staples uses mild, natural acids to dissolve tarnish without being harsh on the brass itself.
Polishing Unlacquered Brass for a Brilliant Shine
For unlacquered brass, polishing is that final, rewarding step that takes the finish from clean to stunning. Put a small dab of a high-quality, non-abrasive brass polish on a fresh cloth. Work it into the faucet using small, circular motions.
You’ll notice the cloth turning black as it lifts the oxidation off the metal—that’s a good thing! Keep polishing in sections until the entire faucet has a consistent, renewed glow, then grab a final clean cloth to buff away any leftover polish.
A key takeaway for polishing is consistency. Work in small sections and apply even pressure to avoid a patchy finish. The goal is to restore a uniform gleam across the entire fixture.
Don't Forget the Aerator
What good is a beautiful faucet if the water pressure is terrible? The usual suspect is a clogged aerator, that little screened cap at the end of the spout. It’s designed to catch mineral deposits and debris, but over time, that buildup can seriously slow down your water flow.
Cleaning it is simple. Carefully unscrew the aerator with your adjustable wrench (you might want to wrap the jaws in tape to prevent scratching). Drop the small part into a bowl of white vinegar and let it soak for a few hours.
After its bath, use your small brush to scrub away any loosened gunk, give it a good rinse, and screw it back on. This single, easy step can make a world of difference and bring your water pressure right back to where it should be.
Keeping Your Brass Faucet Looking Its Best for Years to Come
A beautiful brass faucet doesn't stay that way by accident. It's all about building good habits, not just tackling a deep clean once in a blue moon. When you shift your mindset to preventative care, you'll find that preserving its shine and function becomes almost effortless.
The single best thing you can do? Wipe the faucet dry after you use it. Keep a dedicated microfiber cloth right by the sink. It takes two seconds, but that simple action stops water droplets from drying and leaving behind those chalky, stubborn mineral spots that are a real headache to remove later.
Build a Simple, Sustainable Cleaning Routine
When it comes to the long-term health of your faucet, consistency beats intensity every single time. A quick weekly habit is all it takes to prevent grime from building up and protect the brass itself.
Your Weekly Wipe-Down: Once a week, grab a soft cloth, dampen it with warm water, and add just a tiny drop of pH-neutral soap. Gently go over the entire faucet to lift away any fingerprints or soap scum.
Rinse and Dry Immediately: This is non-negotiable. Follow up with a clean, damp cloth to rinse, and then—the most important part—thoroughly dry and buff the fixture with a fresh microfiber cloth. This prevents new water spots and brings back that warm glow.
Honestly, for both lacquered and unlacquered brass, this gentle routine is usually all you need. It catches the daily buildup before it ever becomes a problem.
The "Do Not Use" List: Products to Absolutely Avoid
Knowing what not to put on your faucet is just as critical as knowing what to use. Many beautiful fixtures have been ruined by common household cleaners that contain chemicals that will permanently damage brass and almost certainly void your warranty.
Make sure you steer clear of anything with these ingredients:
-
Bleach: It's incredibly corrosive to brass alloys. Over time, it will cause discoloration and can even weaken the metal itself.
-
Ammonia: You'll often find this in glass cleaners. It's notorious for stripping the protective lacquer right off and will aggressively tarnish unlacquered brass.
-
Abrasive Powders or Creams: Products like scouring powders are a death sentence for a smooth finish. They create countless micro-scratches that will permanently dull the surface.
-
Steel Wool or Abrasive Sponges: Never, ever use these. They will leave deep, visible scratches on any brass finish, whether it's lacquered or not.
Sticking to simple, approved cleaning methods is the best way to protect your investment. The right care truly makes all the difference in how your faucet looks and performs years down the line.
Brass Faucet Care: Your Questions Answered
Even with the best cleaning routine, you’re bound to run into a few questions. Brass can feel a little finicky, especially when you're trying to protect that beautiful finish, so let's clear up some of the most common issues people face.
Think of this as your go-to troubleshooting guide. Whether you're staring at a new faucet wondering what kind of finish you even have, or dealing with a stubborn green spot that just won’t quit, you'll find the answers here.
How Can I Tell if My Brass Faucet Is Lacquered or Unlacquered?
This is the first and most important thing to figure out, and luckily, it's pretty straightforward.
A lacquered faucet will have a consistent, glossy sheen that doesn't change over time. That’s because it's sealed with a clear, protective coat. On the other hand, an unlacquered faucet has what we call a "living finish"—it’s meant to age. It will develop a unique patina, showing darker areas, subtle color shifts, and a softer, more muted look as it gets older.
If you’re still not sure, here's a quick test:
-
Find a hidden spot on the faucet, like the underside of the handle or the very back of the base.
-
Put a tiny dab of good-quality brass polish on a clean, soft cloth.
-
Gently rub that spot for a few seconds.
-
If the cloth comes away black or dark gray, you've got unlacquered brass. That dark residue is just the oxidation you're polishing off. If the cloth stays clean, your faucet is lacquered, and you should stick to mild soap and water only.
What Are These Green Spots, and How Do I Get Rid of Them?
Those green spots are called verdigris. It’s a completely natural patina that forms on unlacquered brass when it's exposed to moisture for a long time—very common right around the base of the faucet where water tends to puddle.
To tackle them on unlacquered brass, mix up a simple paste from things you probably already have in your kitchen: equal parts salt, flour, and white vinegar. Apply this paste right on the green spots and let it work for 10-20 minutes. Then, just rinse it away with warm water and buff the area completely dry with a soft cloth.
Now, if you see green spots on a lacquered faucet, that's a different story. It means the protective coating has been damaged, and it's best to check with the manufacturer for their specific care instructions.
Whether to polish an unlacquered faucet is all about personal taste. If you love that brilliant, high shine, polishing every four to six weeks will keep it looking brand new. But if you appreciate the warm, evolving character of a natural patina, just clean it gently and let it age gracefully.
At GRANDJOY, we're all about combining timeless elegance with quality that lasts. Our premium brass faucets are crafted to be the centerpiece of your kitchen or bathroom for years to come. See for yourself and explore our curated collections to find the perfect fixture for your home at GRANDJOY.


Leave a comment
This site is protected by hCaptcha and the hCaptcha Privacy Policy and Terms of Service apply.