

Installing a new ceiling fan with a light is a fantastic weekend project that can transform a room's comfort and style. But before you get started, it's essential to set the stage for a safe and secure installation. A little prep work now saves a ton of headaches later and ensures your fan runs smoothly and safely for years.
Your Foundation for a Safe Installation
A successful fan installation isn't just about wiring; it's about making sure your home is ready for it. This all starts with creating a safe work environment, confirming your ceiling can handle the load, and never skipping the most critical safety steps.

Critical Safety First: Kill the Power
This is the one step you can't afford to get wrong. Before a single tool comes out, you need to completely cut the power to the circuit you'll be working on. Don't just flip the wall switch—that's not enough.
- Head to your home's main electrical panel.
- Find the breaker that controls the power to the light fixture in that room.
- Flip it firmly to the "OFF" position.
It's a good practice to put a small piece of tape over the breaker switch. It’s a simple trick that prevents someone from unknowingly flipping it back on while you’re working. Once that's done, double-check your work at the ceiling with a non-contact voltage tester. If it doesn't light up or beep, you're clear to proceed.
The Right Tools for the Job
Nothing stalls a project faster than having to stop and search for the right tool. An organized workspace is a safe and efficient one. Before you climb that ladder, take a moment to gather everything you'll need.
Here’s a quick rundown of the essentials for a smooth ceiling fan installation.
Essential Tools and Safety Gear Checklist
Gather these items before you begin to ensure your ceiling fan installation is safe and efficient.
| Tool/Gear Category | Specific Items | Purpose |
|---|---|---|
| Electrical Safety | Non-Contact Voltage Tester, Wire Strippers, Wire Nuts/Connectors, Electrical Tape | Safely confirm power is off, prep wires, secure connections, and insulate them. |
| Screwdrivers & Wrenches | Phillips & Flat-Head Screwdrivers, Adjustable Wrench or Socket Set | Assemble fan components, tighten mounting hardware, and secure blade brackets. |
| Climbing & Stability | Sturdy Stepladder or A-Frame Ladder | Provide a safe, stable platform so you can comfortably reach the ceiling. |
| General Hardware | Pliers (Needle-Nose and/or Linesman), Drill with Assorted Bits (optional) | Grip wires, tighten nuts, and drill new pilot holes if needed. |
| Personal Protection | Safety Glasses | Protect your eyes from dust, debris, and any small parts that might fall. |
Having these items within arm's reach will make the entire process feel much more streamlined and professional.
Assessing Your Space and Support Structure
Here's something many first-timers overlook: not all ceiling boxes are created equal. The standard plastic or metal box used for a simple light fixture is not strong enough to support the weight and constant motion of a ceiling fan.
Crucial Check: Peek inside the existing electrical box in your ceiling. You're looking for a stamp or label that explicitly says "Acceptable for Fan Support" or something similar. If you don't see it, you must replace it with a fan-rated box. These are designed to hold at least 70 pounds.
Incorrect wiring and insecure mounting are the primary culprits behind most ceiling fan mishaps. This is precisely why that fan-rated box is non-negotiable.
Once your fan is up, a final pro-tip is to take the time to balance the blades. It’s a small step that makes a huge difference in preventing wobble, reducing stress on the motor, and ensuring a long, quiet life for your fan. Always remember to maintain at least 7 feet of clearance from the blades to the floor for safety.
Securing the Fan for Rock-Solid Support
You can tell a great ceiling fan installation from a mediocre one by how it runs. The best ones are dead silent and absolutely still at the base. That kind of stability doesn't happen by accident—it all comes down to a solid mount. Getting this part right isn't just a suggestion; it's the non-negotiable foundation for a safe, quiet fan that will last for years.
Prepping the Ceiling and Electrical Box
First things first, let's get that old light fixture out of the way. After you've confirmed the power is off at the breaker, go ahead and disconnect the fixture's wires and unscrew it from the ceiling. This will expose the electrical box and wiring, giving you a clear look at what you're working with.
Now for the single most important check of the entire project: that electrical box. I can't stress this enough—the standard plastic or metal box that holds a simple light fixture is not built to handle the weight and constant motion of a ceiling fan. You absolutely must confirm the box is fan-rated.
- Look for Markings: A proper fan-rated box will be made of metal and usually stamped with a message like "Acceptable for Fan Support" on the inside.
- Check the Mounting: It should be screwed directly into a ceiling joist or a purpose-built fan brace spanning between two joists. If your box is just hanging on to the drywall, it has to go.
If you find a standard box up there, you'll need to replace it or add a support brace. This is a critical safety step you cannot skip.
A Note from Experience: The aftermath of fans hung on standard boxes can be severe. Never hang a ceiling fan from a non-rated box. The risk of it falling is very real. Taking the time to install a proper fan-rated box is essential.
Options for Upgrading Your Electrical Box
So, your box isn't rated for a fan? Don't worry, you have a couple of solid options. The route you take really just depends on whether you can get into the attic space above the room.
If You Have Attic Access This is the old-school, rock-solid method.
- Cut a piece of 2x4 lumber so it fits snugly between the two ceiling joists.
- Screw that 2x4 brace into the joists, making sure it sits flush with the bottom edge of the joists.
- You can then mount your new fan-rated electrical box right onto that sturdy wood brace. It’s not going anywhere.
If You Don't Have Attic Access No attic? No problem. This is what retrofit braces are for.
- Grab an adjustable metal fan brace from the hardware store. They're designed specifically for this situation.
- Once the old box is out, you slide the collapsed brace through the hole and rest it on the drywall between the joists.
- Then you just twist the bar, which expands it until the sharp ends dig firmly into the wood joists on either side. The new box then bolts directly to that brace.
Assembling the Fan Motor and Downrod
With the ceiling support sorted, you can turn your attention to the fan itself. Inside the box, you'll find the motor, a downrod (the pipe connecting the fan to the ceiling mount), a decorative canopy, and the mounting bracket.
Start by carefully feeding the fan's wires from the motor up through the downrod. Here’s a little pro tip: wrap a small piece of electrical tape around the wire ends. This bundles them into a neat point, making them much easier to thread through without snagging or scraping the insulation.
Next, attach the downrod to the motor housing exactly as the manufacturer’s instructions show. This part usually involves a clevis pin and a cotter pin to lock everything in place. Go ahead and tighten every screw to the recommended spec—this is your best defense against rattles and wobbles down the road.
Hanging the Motor Assembly
Now you’re ready to connect the fan to the ceiling. Securely screw the fan’s mounting bracket to your newly installed, fan-rated electrical box. Give it a good tug to make sure it’s absolutely solid with zero wiggle.
With the bracket in place, carefully lift the motor and downrod assembly up to the ceiling. Most modern brackets have a brilliant feature—a small J-hook or a slot that lets you temporarily hang the whole unit by its canopy ball. This little detail is a game-changer, freeing up both of your hands to tackle the wiring. It’s what makes the whole how to install ceiling fan with light process manageable for one person.
Wiring Your Fan and Light with Confidence
Alright, with the fan motor hanging securely, it's time to tackle the wiring. This is the part of the job that makes a lot of people nervous, but it’s more straightforward than you might think. All we’re doing is matching up the right wires so your house can "talk" to the fan.
The goal here isn't just to get it working, but to make connections that are safe, secure, and built to last. A sloppy connection can cause headaches down the road, so let's get it right the first time. This is a crucial part of any safety guide for ceiling fan installation.
Understanding the Wire Colors
Before you touch anything, let’s quickly decode what you’re looking at. In most North American homes, the wiring follows a standard color scheme.
- Black Wire: This is your "hot" wire, carrying the electrical current from the breaker.
- White Wire: This is the "neutral" wire. It completes the circuit by carrying that current back to the panel.
- Green or Bare Copper Wire: This is your ground wire—a vital safety feature that protects against electrical shock.
Your new fan will have a similar set of wires, often with an extra blue wire that’s specifically for the light kit.
Safety Grounding Is Non-Negotiable: If you only remember one thing, make it this: always connect the ground wire first. It's your primary defense against electrical faults. A proper ground connection ensures that if a wire comes loose and touches the fan’s metal housing, the current will have a safe path to the earth, tripping the breaker instead of electrifying the fan. Connect all the green or bare copper wires—from the house, the bracket, and the fan motor—together.
Making Secure Connections
The secret to a reliable, spark-free connection is solid metal-to-metal contact, all tucked safely inside a wire nut.
- Strip the Wires: Using your wire strippers, carefully remove about 3/4 inch of the plastic insulation from the end of each wire you'll be connecting.
- Twist Them Together: Hold the bare copper ends of the wires you're joining (for example, the two black wires) and use your pliers to twist them together clockwise. You want a firm, tight twist.
- Cap with a Wire Nut: Screw a wire nut over the twisted wires, again, turning it clockwise until it's snug. Give it a gentle tug to make sure it's not going anywhere. You shouldn't see any bare copper showing below the edge of the nut.
Mastering this simple process is fundamental to learning how to install a ceiling fan with light correctly.
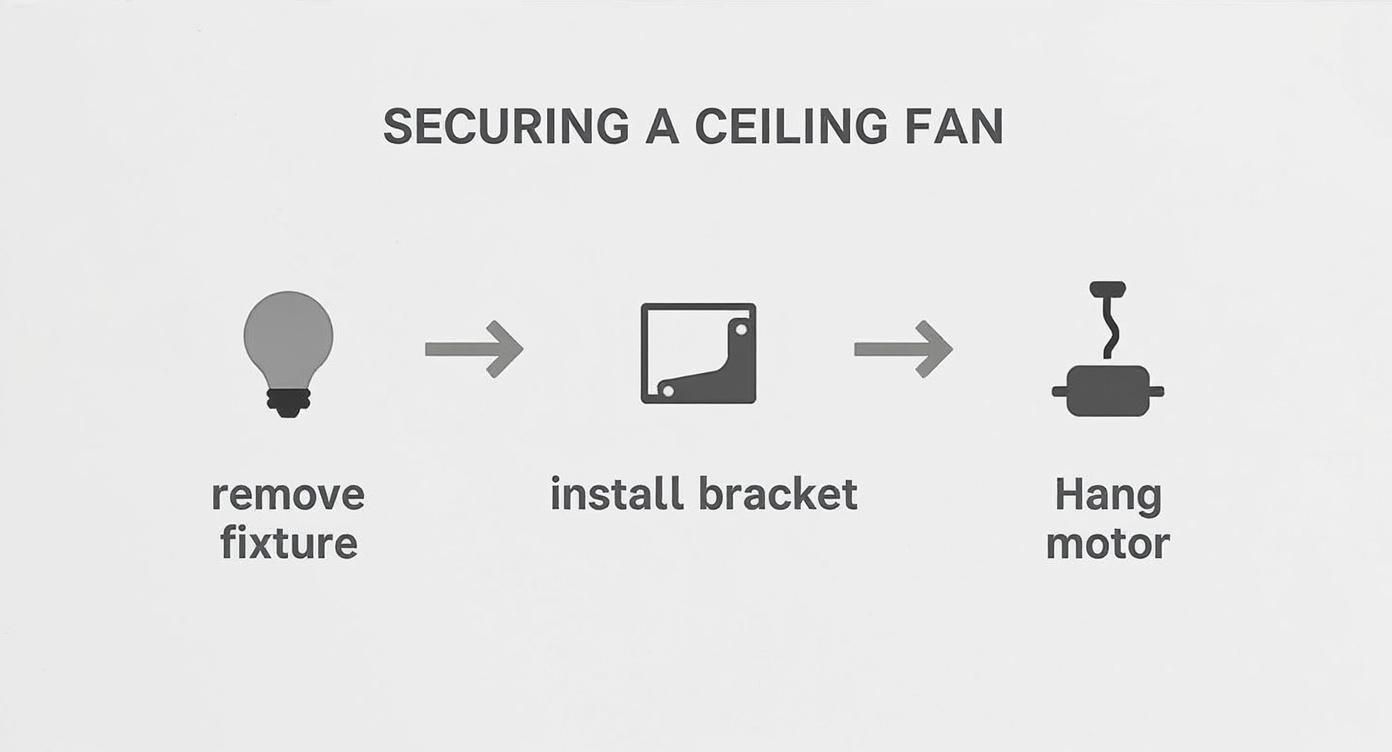
The image above gives you a good visual of the initial setup. Getting the mechanical parts right provides a solid foundation before you even think about connecting a single wire.
Wiring for Your Specific Setup
The exact connections will depend on how your room is wired. Here are the two most common scenarios you'll run into.
Scenario 1: Single Wall Switch This is the most common setup you'll find, where one switch on the wall controls both the fan and the light together.
- Ground: Connect the green/copper wires from the ceiling, bracket, and fan all together.
- Neutral: Connect the white wire from the ceiling to the white wire from the fan.
- Hot: Connect the black wire from the ceiling to both the fan’s black wire (for the motor) and the fan’s blue wire (for the light).
Scenario 2: Dual Wall Switches In some rooms, you might have two separate switches—one for the fan and one for the light. If so, you should see an extra "hot" wire in your ceiling box, which is usually red.
- Ground & Neutral: These get connected just like in the single-switch setup.
- Fan Hot: Connect the black wire from the ceiling to the black wire from the fan.
- Light Hot: Now, connect the red wire from the ceiling to the blue wire from the fan.
Installing a Modern Smart Fan with a Remote
Many new fans come with a remote control, which means you have one extra piece to install: the receiver. This little black box is the "brain" that translates signals from the remote to the fan.
The smart ceiling fan market is booming, expected to hit nearly USD 1 billion by 2025, with over 80% of these units going into homes. While they offer incredible convenience, they also add an electronic component that makes proper wiring and grounding even more critical.
The receiver will have wires coming out of both ends. One set connects to your house wiring, and the other connects to the fan's wires. Just match the colors on both sides as per the manufacturer's diagram. The receiver is designed to slide right into the mounting bracket, sitting just above the downrod ball. Once it's all connected, carefully tuck all the wiring up into the canopy, making sure no wires get pinched as you slide it up and secure it to the ceiling.
Finishing Up: The Final Assembly
Alright, the hard part's over. The motor is up, the wiring is sorted, and you're officially on the home stretch. Now it's time for the details that turn this project from a spinning motor into a stylish fixture—attaching the blades and getting the light kit installed.
A little patience here goes a long way. Rushing these last few steps is the number one reason people end up with a wobbly, noisy fan, so let's get it right the first time.
Attaching the Fan Blades the Right Way
The fan blades aren't just for looks; their balance is everything for a smooth, silent fan. Don't blow through this step.
Most fans require you to first attach each blade to a metal bracket called a blade iron. You'll use the screws included in the hardware pack for this. It's recommended to start all the screws for one blade by hand first, getting them just snug. This lets you make sure the blade is sitting perfectly flat against the iron before you go back and give them a final, firm tightening with your screwdriver.
After you've got all the blades mounted to their irons, you can attach the assembled pieces to the fan motor.
A Pro's Trick for Perfect Alignment: When you attach the blade irons to the motor, don't tighten the first screw all the way down. Instead, get all the screws started loosely for that one blade. This gives you a bit of play to line everything up perfectly before you lock it down. Do this for every single blade, and you'll have a much better-balanced fan right out of the box.
This simple technique is one of the best ceiling fan installation tips you can get for preventing that annoying wobble before it even starts.
Installing the Light Kit
Blades are on? Great. Let's get the light fixture hooked up. This part is usually pretty simple, just a couple of quick wire connections and a few screws.
Your light kit will come with its own wires—typically a black or blue one for power and a white neutral wire. These are meant to connect to the matching wires you left dangling from the fan's switch housing.
- Connect the light kit’s blue (or black) wire to the fan’s blue wire with a wire nut.
- Connect the light kit's white wire to the fan’s white wire with a wire nut.
On many modern fans, this is even easier, using a simple plug-in molex connector that just snaps together.
Once connected, gently tuck the wires up and out of the way inside the housing. You don't want to pinch anything when you attach the light kit itself, which usually fastens with a few small screws directly into the fan assembly.
The Finishing Touches: Glass and Bulbs
We're almost there. The very last thing is to install the light bulbs and put on any glass shades. Double-check your fan's manual for the maximum wattage allowed. Sticking to this is a crucial safety measure to prevent overheating and fire risk. Using LED bulbs is a good choice as they run cool and save energy.
After screwing in the bulbs, attach the glass shades. These are often held on with little thumbscrews. Just tighten them until they're snug. If you crank down on them too hard, you risk cracking the glass.
Now, for the moment of truth. Go flip the breaker back on, hit the wall switch, and test everything out. Run the fan through all its speeds and flick the light on and off. If everything works as it should, you're done!
Remember, for any specific model, your best friend is the manual that came in the box. It will have diagrams for your exact fan. If you've lost it, you can almost always find a digital version or helpful videos on the manufacturer's website.
Fine-Tuning for Flawless Performance
Alright, the power is back on and the fan is spinning. You're almost at the finish line, but this last step is what separates a good installation from a great one. Now it's time to fine-tune your work to ensure everything runs smoothly—no wobbles, no weird noises, just whisper-quiet air movement.
This is where a little patience pays off big time, ensuring your fan performs perfectly for years to come.
Let's start by tackling the most common post-install headache: the dreaded fan wobble.
Eliminating Fan Wobble for Good
A tiny bit of movement is to be expected, but if your fan is swaying more than just slightly, it needs to be addressed. The good news is, the fix is usually pretty straightforward. Before you even think about grabbing that balancing kit that came in the box, let's run through a quick mechanical check.
- Check Every Single Screw: First things first, kill the power at the breaker again. Hop back on your ladder and systematically check every screw you touched. Check all of them—the ones holding the bracket to the ceiling box, the set screws on the downrod, and especially the screws attaching the blade irons to the motor. The majority of wobble issues come from a single loose screw.
- Inspect the Blade Height: With the fan off, grab a tape measure and check the distance from the ceiling to the tip of each fan blade. If you find one blade is sitting noticeably higher or lower than its neighbors, the blade iron might be slightly bent or not seated flush. You can often fix this with a gentle adjustment. If that doesn't work, sometimes just swapping two adjacent blades is all it takes to solve the problem.
Still have a wobble? Now it’s time to break out the balancing kit. This is a simple process of elimination where you find the one blade that's throwing things off and add a small weight to correct it.
Using a Balancing Kit: Start by clipping the plastic test weight from your kit onto the trailing edge of any blade, about halfway between the motor and the tip. Turn the fan on high speed and watch. Turn it off, move the clip to the next blade, and repeat the process. You'll see the wobble dramatically decrease when the clip is on the unbalanced blade. Once you've found the culprit, you can slide the clip in and out along the blade's edge to pinpoint the perfect spot before peeling and sticking one of the adhesive weights to the top of the blade right there.
Common Installation Issues and How to Fix Them
Sometimes the problem isn't a wobble, but a fan or light that just won't turn on. Don't panic! It's usually a simple fix. This quick reference table can help you diagnose the most common electrical hiccups you might run into after an installation.
| Symptom | Potential Cause | Solution |
|---|---|---|
| Nothing Works (Fan or Light) | No power to the fan. | Check that the circuit breaker is on. Make sure the wall switch is flipped on. Use a voltage tester to confirm power is reaching the ceiling box. |
| Fan Works, Light Doesn't | Faulty light kit connection or bulb. | Turn the power off. Double-check the blue wire connection between the fan motor and the light kit. Ensure the bulb is screwed in all the way and isn't burnt out. |
| Light Works, Fan Doesn't | Faulty motor connection or remote setting. | Turn the power off. Re-check the black wire connection for the fan motor. If you're using a remote, check the receiver's wiring and confirm the dip switches on the remote and receiver match. |
| Fan Makes a Clicking Noise | Wires are hitting the canopy or a screw is loose. | Turn the power off at the breaker. Carefully tuck all the wires up into the canopy so they're not touching any moving parts. Re-tighten all blade and motor screws. |
This table should get you through most post-install snags. Remember to always turn the power off before making any adjustments.
Optimizing Airflow for Every Season
One of the most overlooked features of a modern ceiling fan is its ability to make your home more comfortable all year round. It all comes down to a small reverse switch, usually found on the side of the motor housing. This kind of year-round efficiency is a major reason the global ceiling fan market, valued at USD 14.6 billion in 2025, is seeing such strong growth. Homeowners want smart, energy-saving solutions.
Here’s how to put your fan to work, no matter the season:
- Summer Mode (Counter-Clockwise): For cooling, you want the blades spinning counter-clockwise. This creates a direct downdraft, a breeze that makes the room feel significantly cooler.
- Winter Mode (Clockwise): During colder months, flip the switch to make the blades turn clockwise on a low speed. This pulls cool air upward, which then pushes the warm air that naturally rises and gets trapped at the ceiling back down into the living space.
Making this simple switch is one of the easiest ways to get the most out of your new fan.
Have a Question? We've Got Answers
Even the most straightforward ceiling fan installation can throw you a curveball. It happens. Here are some of the most common questions that pop up mid-project, answered with the kind of practical advice you might need.
Do I Really Need a Special Box for a Ceiling Fan?
Absolutely, and this is non-negotiable for safety. You have to use an electrical box specifically marked "fan-rated" or "Acceptable for Fan Support." A standard box you'd use for a simple light fixture just won't cut it—it isn't built to handle the dynamic load and constant vibration of a running fan.
Think of it this way: fan-rated boxes are designed to support at least 70 pounds and are anchored directly to a ceiling joist or a solid wood brace between joists. Hanging a fan from a regular light fixture box is a recipe for disaster. It can—and often does—lead to the fan falling, which is a serious risk to both people and your property.
My New Fan is Wobbling—What Did I Do Wrong?
A wobbly fan is a classic problem, but thankfully, it's usually an easy fix. Before you get too far into troubleshooting, do a quick audit of every single screw. Go back and make sure the mounting bracket, downrod, blade arms, and the blades themselves are all tightened down securely. Sometimes, it's as simple as one loose connection. Also, check that the canopy is snug against the ceiling.
Still shaking? Time to break out the balancing kit that came in the box.
- Clip the small plastic weight onto the edge of one fan blade.
- Turn the fan on its highest setting and see if the wobble improves.
- Repeat this process for every single blade.
- When you find the blade where the clip makes the biggest difference, that's your culprit. Stick one of the small adhesive weights on the top center of that blade, and you should be good to go.
What if I Have a Sloped or Angled Ceiling?
No problem. Most modern fan kits are designed to handle a bit of a slope right out of the box, usually up to a 30-degree pitch. The design of the downrod ball and mounting bracket allows the fan to hang straight down, just as it should.
If you're dealing with a really steep A-frame or vaulted ceiling, you'll need to grab a sloped ceiling adapter or an angled-mount kit. This isn't just an optional accessory; this specialized hardware is crucial for keeping the fan level, ensuring the blades have enough clearance, and preventing extra wear and tear on the motor.
When Should I Just Call an Electrician?
Look, DIY is great, but knowing your limits is even better, especially with electrical work. Your safety is always priority number one. It's time to put down the tools and call a licensed electrician if you run into any of these situations:
- You need to run completely new wiring to the fan's location.
- You open the box and discover old aluminum wiring (it requires special handling).
- You need to install a new fan-rated box and a support brace, and you aren't 100% comfortable cutting into your ceiling and working with joists.
Seriously, if you feel even slightly unsure at any point, making that call is the smartest move you can make.
For a home that reflects your commitment to quality and style, explore the curated collections at GreenEver. Discover premium fixtures that bring lasting elegance to your kitchen and bathroom projects. Visit GreenEver to find the perfect finishing touches for your home.


Leave a comment
This site is protected by hCaptcha and the hCaptcha Privacy Policy and Terms of Service apply.