
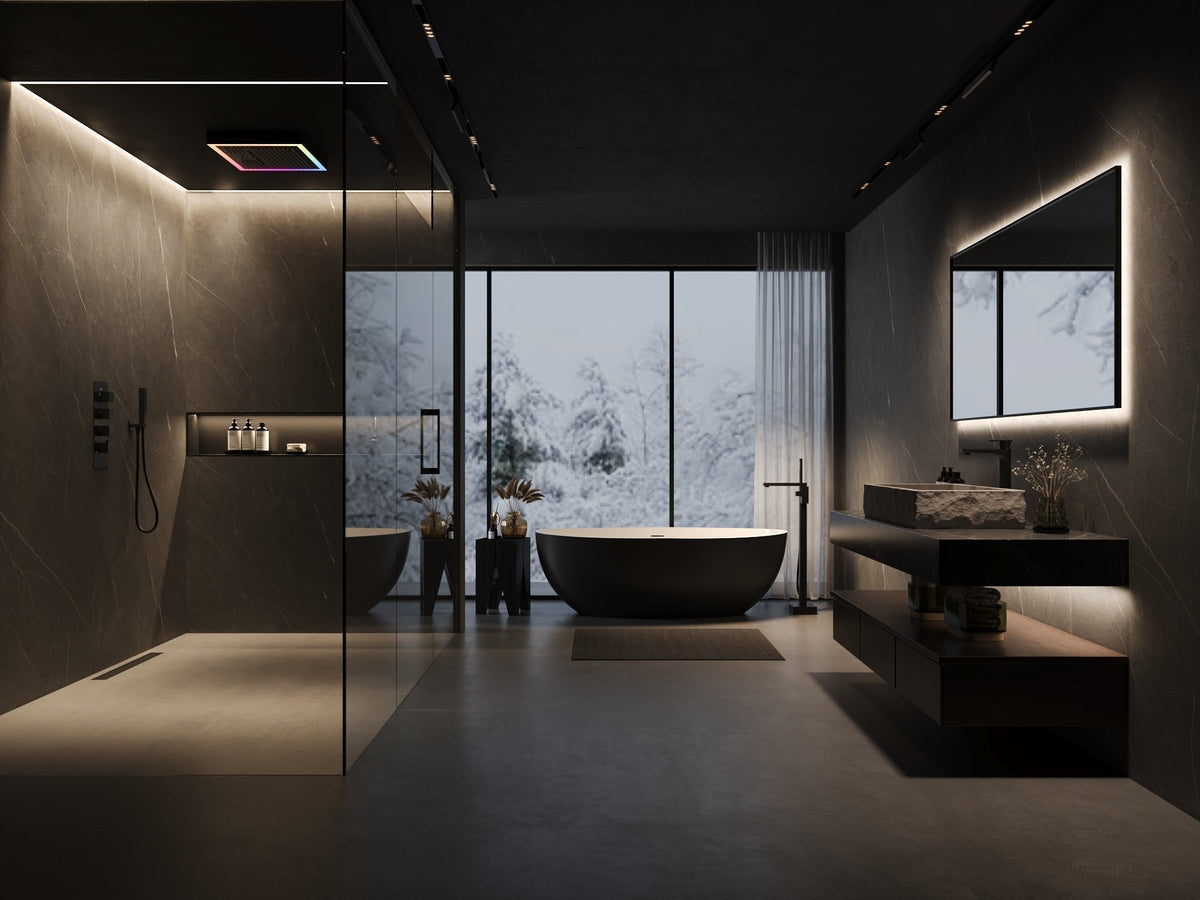
A successful bathroom remodel should improve both the way the room looks and the way it works every day. A spa-like atmosphere comes from more than a freestanding tub or decorative tile. Layout, lighting, ventilation, storage, water pressure, maintenance, and product compatibility all affect the final result.
Use the ideas below as a design direction, not a checklist that must fit every bathroom. Start with the room’s size and plumbing constraints, choose one coherent style, and prioritize changes that improve safety, function, and long-term durability.
1. Choose One Clear Design Direction
Before selecting tile or fixtures, define the overall style in one sentence. This keeps every later decision consistent.
Modern minimalist
Use clean lines, integrated storage, large-format tile, and a restrained palette. Matte black, chrome, or brushed metal can add definition without making the room feel busy.
Classic elegance
Use furniture-style vanities, marble or stone-inspired surfaces, polished metal, and detailed trim. The goal is balance rather than adding ornate elements to every surface.
Warm natural
Combine wood tones, textured stone, warm neutrals, and natural finishes. This direction works well in bathrooms intended to feel calm and connected to the rest of the home.
Spa-inspired
Use soft color contrast, organic textures, layered light, simple fixtures, and a strong shower or bathing focal point. Avoid treating every wellness feature as a required purchase.
Choose one primary direction and allow one or two supporting accents. Too many styles make the room feel disconnected.
2. Improve the Layout Before Choosing Finishes
Layout changes have more impact than surface upgrades, but they also create more cost and risk.
Before moving plumbing or walls, confirm:
- The room’s usable walking and door-clearance space.
- The locations of supply, drain, and vent lines.
- Whether the floor structure can support a heavy tub or wet-room design.
- Whether a curbless shower or wet room requires changes to waterproofing and drainage.
- How the vanity, toilet, shower, and storage zones relate to one another.
If the plumbing layout already works, spend the budget on better materials, lighting, ventilation, and storage instead of moving fixtures without a clear benefit.
3. Create a Better Shower Experience
The shower is often the most frequently used area of a bathroom remodel.
Rainfall shower
A ceiling- or wall-mounted rainfall head creates broad coverage and a spa-like feel. Confirm ceiling support, water pressure, flow rate, and drainage before installation.
Hand shower
A hand shower improves flexibility for rinsing, cleaning, and accessibility. A slide bar allows the height to be adjusted.
Body sprays
Body sprays can increase comfort, but they add outlets, supply demand, installation complexity, and cost. Plan them as a coordinated system rather than adding them later.
For a more useful shower, choose a system with serviceable cartridges, easy-clean nozzles, and compatible trim.
Recommended product: Wall-Mounted Two-Function Shower System with Pressure-Balanced Valve. This coordinated system fits a modern shower layout where rainfall and handheld functions are both needed. Compare the valve type, finish, outlet count, and rough-in requirements before ordering. Browse the full Shower Systems collection for more configurations.
4. Add Temperature and Pressure Control
A thermostatic or pressure-balancing valve can improve comfort and reduce sudden temperature changes when another fixture uses water.
Consider:
- A thermostatic valve for precise temperature control.
- A pressure-balancing valve when stable pressure is the main concern.
- Separate volume and temperature controls when multiple shower outlets are used.
- A temperature limit stop set and verified during installation.
Concealed valves and shower systems should be planned before tile work begins. The rough-in valve and trim must be compatible.
Recommended product: Exposed Thermostatic Tub and Shower System with 10-Inch Rain Shower Head. This is a strong fit for a spa-style renovation that needs thermostatic temperature control and a rainfall shower. Confirm the exposed valve layout, outlet positions, water pressure, and finish before installation. Explore Thermostatic Shower Systems for related options.
5. Make the Vanity the Practical Focal Point
The vanity carries much of the room’s storage, lighting, and visual weight. Start with the sink and storage needs before choosing the cabinet style.
Vessel sink
A vessel sink creates a strong visual statement but needs enough counter depth, faucet height, and cleaning clearance.
Undermount sink
An undermount sink creates a cleaner countertop and is easier to wipe around. Confirm that the cabinet and countertop are compatible with the installation.
Wall-mounted faucet
A wall-mounted faucet keeps the countertop clear and creates a custom look, but the rough-in must be planned and serviced correctly.
Use drawers, divided storage, and concealed outlets where they improve daily use. Do not sacrifice counter space for a decorative vanity that cannot store the room’s essentials.

Recommended product: Three-Hole Widespread Bathroom Sink Faucet with Knurled Handles and Swivel Spout. This faucet supports a spacious vanity composition with separate handles and a coordinated metal finish. Verify the 3-hole spread, spout reach, sink clearance, and finish before purchase. Browse Bathroom Sink Faucets for single-hole, centerset, vessel, and widespread options.
6. Use Layered Lighting Instead of One Bright Ceiling Light
Good bathroom lighting combines general, task, and accent light.
- General lighting illuminates the full room.
- Task lighting reduces shadows at the mirror.
- Accent lighting adds depth around niches, the tub, or a feature wall.
Use damp- or wet-rated fixtures where required. Place lights so they do not create glare in mirrors, and provide enough illumination around the shower, toilet, and vanity.
7. Select Materials for Water, Cleaning, and Maintenance
Materials should look cohesive and survive the room’s moisture and cleaning routine.
- Use slip-resistant flooring in wet areas.
- Confirm that wall and floor tile can handle the intended cleaning products.
- Use solid brass or other suitable corrosion-resistant materials for plumbing fixtures.
- Match metal finishes across visible fixtures and hardware.
- Choose grout, sealant, and stone products suitable for wet environments.
- Plan ventilation to reduce moisture and mold growth.
Avoid selecting a material only because it looks good in a showroom. Confirm its slip resistance, cleaning needs, water resistance, and repairability.
8. Add Storage Where It Prevents Clutter
Storage should support the daily routine rather than only fill empty wall space.
- Use a recessed niche for shower products.
- Add drawers instead of deep cabinets when small items are stored.
- Include a concealed outlet for grooming tools where appropriate.
- Provide towel storage close to the shower or tub.
- Keep cleaning supplies accessible but out of sight.
Moisture-resistant materials and ventilation are especially important inside closed storage.
Recommended product: Wall Mounted Double Towel Bar for Bathroom Organization. It supports the organized, spa-like layout described in this section while keeping daily towels within reach. Confirm wall construction, mounting height, and available clearance. Explore Bathroom Accessories for coordinated hardware.
9. Use Smart Features Only Where They Solve a Real Problem
Smart bathroom products can improve convenience, but they also add power, network, maintenance, and replacement considerations.
Useful applications may include:
- Digital shower temperature control.
- Touchless or metered faucets.
- Motion-activated lighting.
- Anti-fog mirrors or heated towel racks.
Before selecting a smart product, confirm power requirements, water compatibility, warranty support, app dependence, and what happens if the smart function fails.
10. Plan Accessibility and Maintenance From the Start
Accessibility features do not need to look institutional.
- A curbless or low-threshold shower can improve access.
- Blocking behind the walls allows grab bars to be added later.
- A handheld shower and adjustable slide bar improve flexibility.
- Comfort-height fixtures can reduce strain.
- A clear turning area helps users with mobility aids.
Also plan how the room will be cleaned and serviced. Access panels, replaceable cartridges, and easy-to-reach shutoff valves make long-term maintenance easier.
Bathroom Remodel Planning Order
- Confirm the layout and structural limits.
- Set the budget and separate must-have work from optional upgrades.
- Finalize plumbing, electrical, ventilation, and waterproofing.
- Select fixtures while the rough-in dimensions are still accessible.
- Order long-lead products before demolition begins.
- Complete rough-in and inspection work.
- Install waterproofing, tile, flooring, and finishes.
- Install fixtures, lighting, mirrors, and accessories.
- Test water, drainage, ventilation, and electrical functions.
- Complete final sealing, cleaning, and documentation.
Frequently Asked Questions
What should I upgrade first in a bathroom remodel?
Start with waterproofing, ventilation, plumbing reliability, and lighting. These systems are difficult to improve later. Then choose visible finishes and decorative features.
Is a freestanding tub always worth the space?
No. It should fit the room’s layout and the household’s actual bathing habits. A better shower, storage, or accessible layout may provide greater daily value.
Can I replace a tub with a walk-in shower?
Often, but the project may involve plumbing, waterproofing, floor structure, and local code requirements. Confirm the design with a qualified professional before demolition.
Should all fixtures have the same finish?
They should feel coordinated, but they do not need to match perfectly. Keep the main visible fixtures consistent and use secondary finishes intentionally.
Do smart bathroom products require professional installation?
Products involving line voltage, concealed plumbing, waterproofing, or integrated controls normally require professional installation and local inspection.
Final Takeaway
The strongest bathroom remodel ideas improve daily function before adding decorative features. Define one design direction, protect the layout and waterproofing, plan the shower system and lighting early, and choose materials based on maintenance as well as appearance.
Use the ten ideas above to build a prioritized plan. If the project changes plumbing, electrical, wall structure, or waterproofing, involve qualified professionals early and keep a clear record of product models, finishes, measurements, and warranty information.
For a coordinated design, choose fixtures and shower components that share compatible dimensions, finishes, and service requirements. Explore GRANDJOY bathroom collections for coordinated options.
Recommended Product Paths
| Design goal | Series page | Specific product example |
|---|---|---|
| Build a coordinated shower | Shower Systems | Wall-Mounted Two-Function Shower System with Pressure-Balanced Valve |
| Add precise temperature control | Thermostatic Shower Systems | Exposed Thermostatic Tub and Shower System with 10-Inch Rain Shower Head |
| Create a vanity focal point | Bathroom Sink Faucets | Three-Hole Widespread Bathroom Sink Faucet with Knurled Handles and Swivel Spout |
| Complete the storage and accessories | Bathroom Accessories | Wall Mounted Double Towel Bar for Bathroom Organization |


Leave a comment
This site is protected by hCaptcha and the hCaptcha Privacy Policy and Terms of Service apply.