

Installing a shower head in the ceiling means running new plumbing up through the joists and adding some extra structural support to hold everything securely. While it delivers that amazing, spa-like rainfall effect, it's a far bigger job than just swapping out a wall-mounted head. Getting it right often means calling in a professional to make absolutely sure it's secure and won’t ever leak.
Why a Ceiling Shower Head Is Worth the Upgrade
If you're looking to turn a functional bathroom into a personal retreat, the shower is the place to start. A ceiling-mounted shower head—often called a rainfall or rain shower—is a world away from your standard wall fixture. It completely changes the way the water feels, creating a gentle, all-encompassing downpour that soaks your entire body at once.
This isn’t just a cosmetic upgrade. It’s a totally different approach to shower design, elevating a daily routine into a moment of pure relaxation. The clean look of a shower head descending from above gets rid of the visual clutter of pipes and wall arms, making the entire space feel more open and thoughtfully designed.
The Benefits of a Rainfall Experience
The biggest appeal of a ceiling-mounted system is how it delivers water. Forget that harsh, angled spray from a typical wall unit. A rainfall head gives you a steady, vertical flow designed to mimic natural rainfall. This even distribution provides full-body coverage and a soothing, spa-like sensation.
Here’s what you really get with this setup:
-
Full-Body Coverage: With their large-diameter heads, you get a wide spray that envelops you completely. No more shuffling around to rinse off.
-
Balanced Water Pressure: The vertical water stream offers a gentle but satisfying pressure, engineered to provide an even, comfortable flow.
-
Enhanced Aesthetics: That sleek overhead placement instantly creates a high-end, spa-inspired look that can boost your bathroom’s appeal and value.
A practical consideration: while the rainfall design is pure luxury, it can make it tricky to keep your hair dry if you don’t shampoo every day. A great solution is adding a handheld sprayer—it gives you flexibility and functionality in one setup.
Is This Upgrade Right for You?
While the appeal is undeniable, a ceiling shower head installation is a serious project. It’s not a simple fixture swap. You’ll need to access the ceiling, run new plumbing, and ensure the structure can support both the fixture and the water lines.
This guide will walk you through from the crucial planning steps to final waterproofing and finishing so you can decide whether to DIY or hire a professional to bring your vision to life.
Critical Planning Before You Start
A successful ceiling shower head installation is 90% planning and 10% execution. Before a single tile is touched or a pipe is cut, you need a solid game plan.
Market studies show the global shower head industry—currently valued at roughly $9 billion—is growing steadily as more homeowners invest in water-efficient, spa-like bathroom fixtures. Many modern low-flow rain shower heads, especially EPA WaterSense-certified models, can reduce water usage by about 20–30% while maintaining that relaxing rainfall experience.
Selecting the Perfect Location
The first decision is placement. It’s more nuanced than finding the center of the shower stall. You must consider each model’s spray radius to keep water contained within the enclosure—misjudging this can lead to a perpetually wet floor.
Also, think about height and who will use the shower. Ideally, the rainfall head sits between 7 and 9 feet from the floor. This provides enough distance for water to spread but not so much that it cools before reaching you. Always visualize the water’s fall path to ensure comfort and coverage.
Evaluating Structural Integrity
Once you’ve chosen a spot, make sure your ceiling can handle the load—not just of the fixture, but the water-filled lines and mounting hardware.
Use a stud finder to locate ceiling joists. The shower head must anchor into solid framing, not drywall. Install blocking (typically a 2x6 or 2x8) between joists to create a secure mounting point. If you have attic access, inspection is easy; if not, cutting a small ceiling access hole is essential for proper evaluation.
Mapping Out the Plumbing and Electrical
Run hot and cold supply lines from the existing shower valve up the wall and across the ceiling to your chosen spot. Keep turns minimal and secure pipes to prevent rattling. PEX tubing is flexible and DIY-friendly, while copper remains a durable classic.
If your shower head includes features such as LED lighting, digital temperature displays, or Bluetooth speakers, you’ll need additional low-voltage wiring—this part should always be handled by a licensed electrician for safety and code compliance.
Gathering Your Tools and Materials
Don’t start cutting until everything you need is ready. Here’s your essentials checklist:
-
Pipe Wrench & Adjustable Wrench: For tightening fittings.
-
Pipe Cutter: Ensures clean cuts on copper or PEX.
-
PEX Crimp Tool or Soldering Kit: Depending on pipe material.
-
Power Drill & Stud Finder: For framing and mounting.
-
Level & Measuring Tape: For precision alignments.
-
1/2-Inch Pipe (PEX, Copper, or CPVC): Check local codes.
-
Assorted Fittings: Elbows, couplings, and adapters to match your pipe type.
-
Mounting Block (2x6 or 2x8): For solid anchoring between joists.
-
Teflon Tape & Silicone Sealant: For watertight connections and sealing.
Always buy a little extra pipe and fittings—it saves time and frustration. Choosing high-quality brass and stainless-steel materials ensures long-term durability and leak resistance.
Bringing Your Ceiling Shower Head Installation to Life
Now that you’re prepared, it’s time to begin.
Setting Up Your Workspace
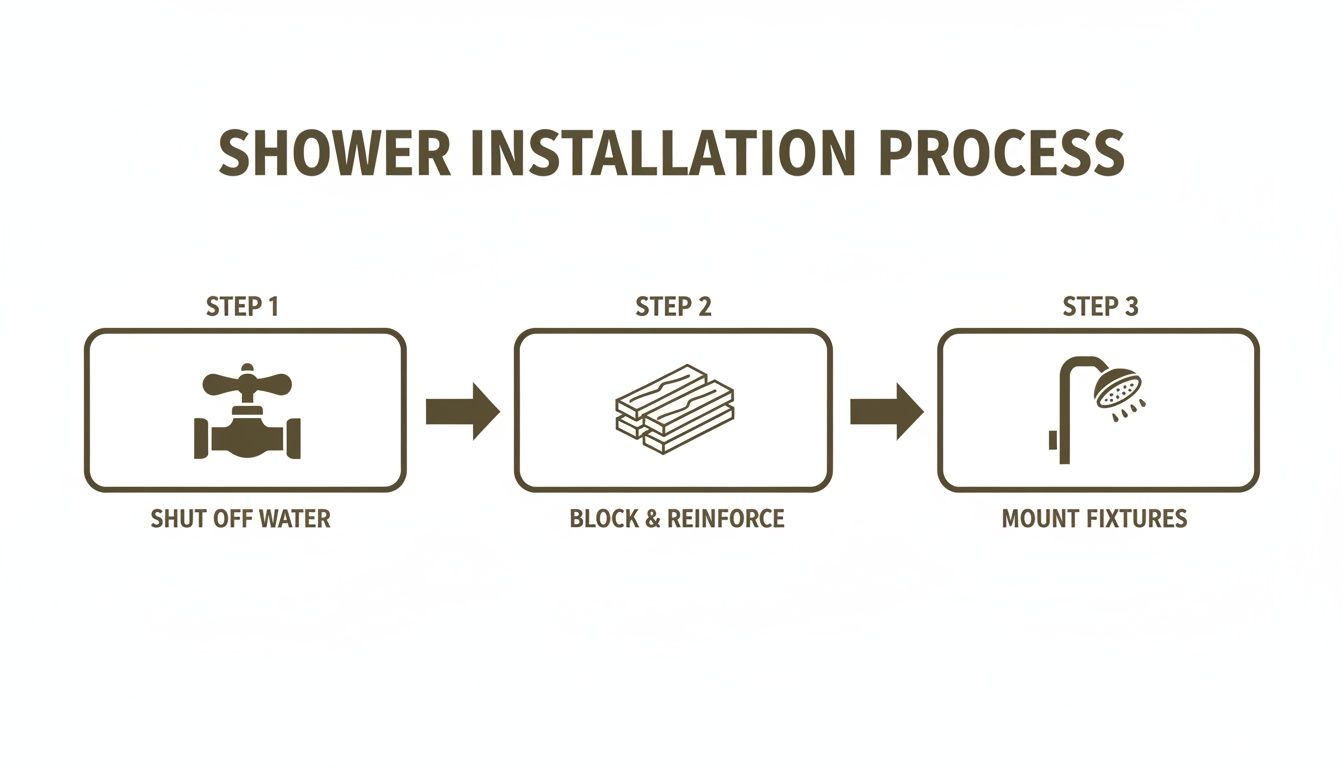
Shut off the main water supply and open a faucet on the lowest floor to drain the system. Protect surfaces with drop cloths, and cover glass doors with cardboard to prevent scratches or breakage.
Gaining Access and Building Support
Locate ceiling joists, then cut a neat access hole between them. Install solid wood blocking flush between joists using 3-inch screws. This creates a strong base for your plumbing and shower head mount.
Running the New Plumbing
Drill through the wall’s top plate to bring the pipe into the ceiling cavity, then route it toward your mounting block. Secure the pipe every few feet. Use a drop-ear elbow screwed directly to the blocking—this ensures a stable fitting for your shower arm.
A small pro tip: Build in a slight downward slope back toward the valve to help the pipe drain fully when the water’s off.
Attaching the Shower Arm and Making the Connection
Wrap Teflon tape clockwise around the shower arm’s threads. Hand-tighten into the drop-ear elbow, then snug it with a wrench—avoid overtightening. Slide up the escutcheon plate to conceal the connection for a clean finish.
Wiring for LED Lights and Smart Features
If your model has electrical features, install the low-voltage transformer in a dry, accessible spot (like an attic or closet). Run and secure the low-voltage cable carefully, following the manufacturer’s guide. The final household connection should always be done by a licensed electrician.
Waterproofing and Finishing Your Installation
Even tiny leaks can cause major damage over time. Use a 100% kitchen-and-bath silicone caulk with mold inhibitors to seal around the shower arm where it exits the ceiling. For a professional finish, mask edges with painter’s tape before caulking and remove the tape while the sealant is still wet.
Repairing the Ceiling
Patch the drywall neatly using the saved piece from your access hole. Screw it to backing wood, tape the seams, and apply two or three thin coats of joint compound, feathering each coat wider. Once dry, sand smooth, retexture if needed, and finish with primer and paint.
The Final Leak Test and Quality Check
Slowly reopen your main water supply. With a flashlight, inspect all joints—from valve to ceiling—for any sign of moisture. Then run the shower for 5–10 minutes and confirm steady flow, no leaks, and proper pressure.
This attention to detail aligns with the rising quality standards across the global shower head industry, now valued near $9 billion. Certifications like cUPC and WaterSense ensure every component performs safely and efficiently.
Answering Your Top Ceiling Shower Head Questions
What’s the Best Height for a Ceiling Shower Head?
Generally, between 7 and 9 feet from the shower floor works best. A flush-mount model suits 8-foot ceilings, while higher ceilings allow for longer downrods for ideal water warmth and dispersion.
Can I Really Do This Myself, or Do I Need a Plumber?
For most homeowners, hiring a licensed plumber is highly recommended. The process involves rerouting lines, adding structural support, and ensuring leak-free, code-compliant installation—tasks best handled by professionals for safety and warranty protection.
What’s the Estimated Installation Cost?
Expect $450–$1,000 in professional labor, depending on project complexity. Simple attic access keeps costs lower; rerouting pipes, cutting into finished ceilings, or adding electrical features can increase pricing.
Can You Install a Shower Head on a Sloped Ceiling?
Yes, but you’ll need a swivel adapter or ball-joint fitting to allow the head to hang level. Ensure the ceiling mount and blocking are especially sturdy to support angled stress.
Ready to transform your bathroom into a relaxing spa-like retreat?
Explore our premium ceiling-mounted shower systems built for timeless design, lasting durability, and leak-free performance.


Leave a comment
This site is protected by hCaptcha and the hCaptcha Privacy Policy and Terms of Service apply.