

When you're building a new home or doing a major remodel, "rough-in" plumbing is one of those terms you'll hear a lot. So, what exactly is it?
Think of it as the skeletal system for your home's water. It's the critical first step where all the pipes—water supply, drains, and vents—are installed inside the walls, floors, and ceilings. This all happens while the framing is still exposed, long before any drywall goes up.
The Invisible Foundation of Your Plumbing

Before you can pick out a fancy faucet or a modern toilet, you have to lay the groundwork. The rough-in phase is exactly that: the behind-the-scenes network that makes all your fixtures work. It’s the one chance to get the placement of every pipe precisely right.
A plumber comes in and runs all the lines through the wall studs and floor joists, mapping out the entire system. Once the drywall is installed, this intricate network is completely hidden from view, but it's the most important part of the entire installation.
What the Rough-In Stage Includes
At its core, the rough-in is all about the unseen infrastructure. A plumber's work during this phase focuses on three key elements:
- Water Supply Lines: These are the hot and cold water pipes (often PEX or copper) that feed every faucet, shower, and toilet.
- Drain and Waste Pipes: This is the network of larger pipes that carries wastewater away, relying on gravity and carefully planned slopes to function correctly.
- Vent Stacks: These pipes are essential for proper drainage. They let air into the system, preventing suction that could slow drains or allow sewer gas into your home.
What It Excludes
It's just as important to understand what isn't part of the rough-in. This stage stops before any of the final fixtures are connected. Things like sinks, toilets, faucets, and shower heads are all installed later, during the "finish" or "trim-out" phase.
The core principle of the rough-in is to establish the correct location and connection points for all future fixtures. It is the architectural blueprint for your home's water flow, and its accuracy determines the success of the entire project.
Getting this invisible framework right is non-negotiable. An error here—even a pipe that's off by an inch—can cause huge headaches later on. It can lead to fixtures that don't fit, costly drywall repairs, or leaks down the road. Simply put, a smooth and successful fixture installation is completely dependent on a perfect rough-in.
Why Getting Your Rough-In Measurements Right is Non-Negotiable
Think of your plumbing rough-in as the skeleton of your bathroom or kitchen. If the bones aren't in the right place, nothing else will fit correctly. It’s the hidden framework that dictates where every sink, toilet, and faucet will ultimately land. Even a half-inch mistake at this stage can snowball into a massive, expensive headache once the drywall goes up.
Sloppy measurements are the root cause of some of the most frustrating renovation nightmares. You might buy a gorgeous new vanity, only to discover the drain pipe is two inches too high, making it impossible to install flush against the wall. Or you could end up with a toilet that can’t be installed because the waste pipe is too close to the wall, leaving no space for the tank. These aren't just minor hiccups; they're major setbacks that can derail your entire project.
Another all-too-common problem is a poorly placed shower valve. If it’s set just a few inches too low or too high, it can make every shower an awkward experience for years. Fixing these errors isn't a simple adjustment. It involves ripping open brand-new drywall, tile, and flooring to get to the pipes—essentially paying to redo work you just finished.
The Snowball Effect of Rework Costs
These corrections are where budgets go to die. Suddenly, you're not just paying a plumber for the initial installation. You're paying them again to tear it out and do it right, plus a drywaller to patch the holes, and a painter to make it all look new again. That small measurement error has now blossomed into a multi-thousand-dollar problem.
Getting the rough-in dimensions perfect from the very start is the single best way to avoid costly rework, keep your project on schedule, and ensure a flawless final installation. It’s an investment in precision that pays for itself many times over.
This level of accuracy is even more critical when you're installing modern, design-forward fixtures. A minimalist wall-mounted faucet from a brand like GRANDJOY or a complex multi-function shower system has absolutely zero tolerance for error. Their sleek designs depend on exact pipe placement; any deviation can make them impossible to install or completely ruin the clean aesthetic you were aiming for.
Protecting Your Bottom Line
For plumbing professionals, the stakes are just as high. The U.S. plumbing industry is a massive market, but profit margins can be razor-thin. For contractors, avoiding rework from incorrect rough-ins isn't just good practice—it's essential for staying profitable and protecting their reputation. You can discover more about trends in the plumbing fixtures market to see how competitive it is.
Ultimately, taking the time to measure twice—or even three times—during the rough-in phase is the one step you can't afford to skip. It's the critical diligence that ensures your carefully chosen fixtures not only fit but function perfectly, exactly as you imagined. It protects your budget, your timeline, and your sanity.
Alright, now that you understand what a rough-in is and why it's so critical, let's get into the brass tacks: the actual numbers. Knowing the standard measurements for common fixtures is like having a cheat sheet for your project. It’s the blueprint that plumbers and builders use to get everything in the right spot from day one.
Think of these as your starting point. While you should always double-check the spec sheet for the specific fixture you’ve chosen, these industry-standard dimensions will get you 90% of the way there. Getting these right is your best insurance against the headaches and surprise costs of having to move pipes later.
The image below really drives home the point. On one side, you have a smooth, on-budget project. On the other? The costly chaos that comes from inaccurate plumbing.
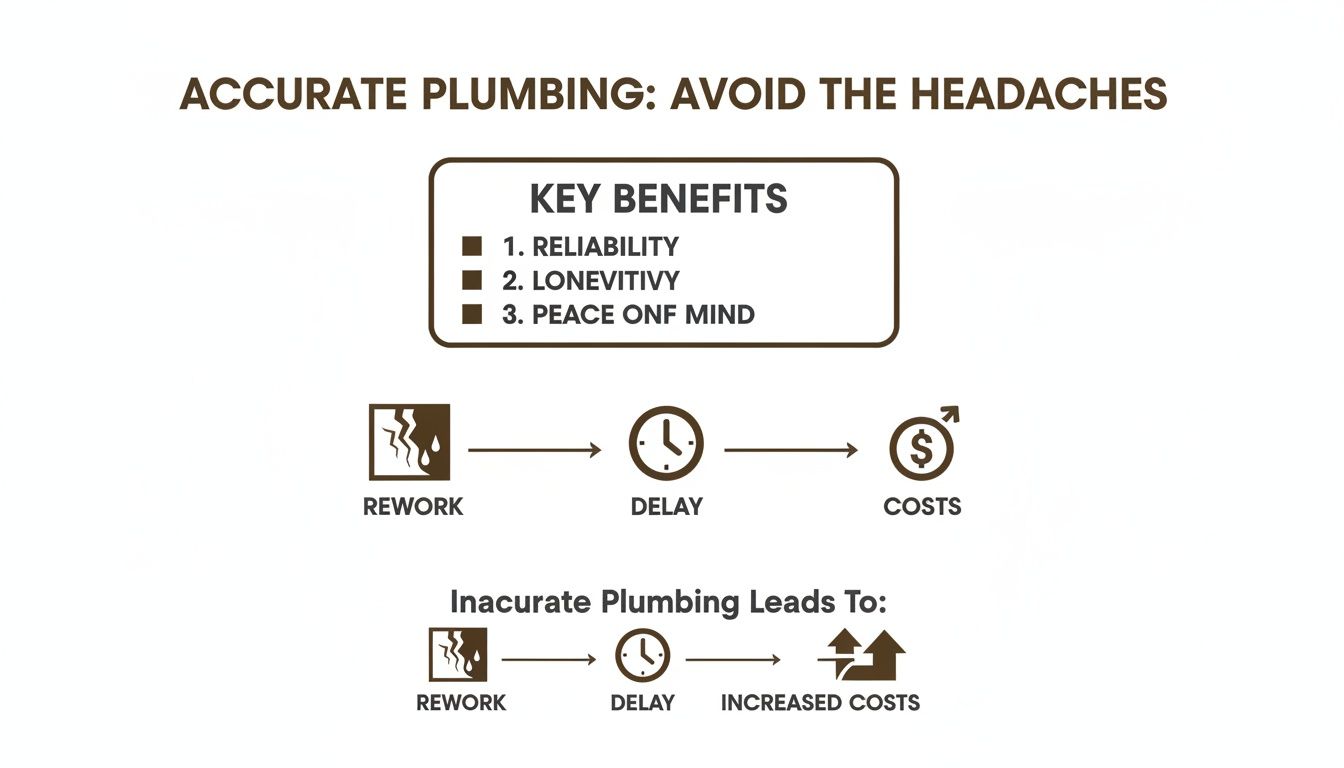
This is why we measure twice (or three times!) and cut once. A little precision during the rough-in stage saves a world of trouble down the road.
Bathroom Rough-In Dimensions
The bathroom is command central for plumbing. With so many fixtures packed into a small space, every inch counts. Here’s a breakdown of the key measurements you'll need.
Toilets This is the big one. The toilet rough-in dimension is the distance from the finished wall behind the toilet to the center of the floor drain. Get this wrong, and your toilet either won't fit or will sit awkwardly far from the wall.
- The Standard: The most common toilet rough-in is 12 inches.
- Older Homes & Tight Spaces: It’s not unusual to find a 10-inch rough-in, especially in older houses or compact powder rooms.
- Larger, Traditional Models: Some bigger, more classic toilet designs require a 14-inch rough-in.
A quick but crucial tip: Always measure from where the finished wall will be, not from the bare studs. If you're building new, remember to account for the drywall (usually 1/2 inch). An off-target toilet flange is a real pain to correct once the flooring is down.
Bathroom Sinks and Vanities For a bathroom sink, you need to place the water supply lines and the drain pipe so they're hidden neatly inside the vanity cabinet.
- Drain Pipe Height: Aim for the center of the drain to be 18 to 20 inches off the finished floor.
- Water Supply Lines: Your hot and cold water lines should sit slightly higher, around 20 to 22 inches from the floor. They should also be spaced about 8 inches apart horizontally, with the hot on the left and cold on the right.
Shower and Tub Measurements
Placing the controls and outlets for a shower or tub is about more than just function—it's about creating a comfortable, intuitive experience.
- Shower Valve Height: The center of the main mixing valve is usually installed 48 inches above the finished floor.
- Tub Spout: This needs to be high enough to clear the tub's edge easily. A standard height is 4 inches above the flood-level rim of the bathtub itself.
- Showerhead Arm: The outlet for the showerhead arm is typically roughed in at 80 inches from the finished floor. This accommodates most users comfortably.
Kitchen Rough-In Guidelines
The kitchen plumbing is a bit simpler, usually centered around the main sink area and any appliances that need water.
- Kitchen Sink Drain: Just like in the bathroom, the drain line is generally placed 18 to 20 inches from the floor.
- Dishwasher Hookups: The hot water and drain connections for a dishwasher are almost always routed from the pipes under the adjacent kitchen sink. No need for a separate rough-in here.
- Refrigerator Water Line: If your fridge has an ice maker or water dispenser, you'll need a dedicated water line. This is typically housed in a recessed box set 12 to 24 inches from the floor, placed so it will be hidden behind the refrigerator.
Standard Rough-In Measurement Cheat Sheet
Here’s a quick-reference table to keep these key numbers handy. Remember, these are standard guidelines—your specific fixture's spec sheet is the final authority. All measurements are from the finished wall or floor.
| Fixture | Component | Standard Measurement (from finished floor/wall) |
|---|---|---|
| Toilet | Drain Center (from wall) | 12" (common), 10" or 14" (less common) |
| Bathroom Sink | Drain Height (from floor) | 18" - 20" |
| Water Line Height (from floor) | 20" - 22" | |
| Water Line Spacing (horizontal) | 8" apart | |
| Shower/Tub | Valve Height (from floor) | 48" |
| Tub Spout Height | 4" above tub rim | |
| Showerhead Outlet Height | 80" | |
| Kitchen Sink | Drain Height (from floor) | 18" - 20" |
| Refrigerator | Water Line Box (from floor) | 12" - 24" |
Having this cheat sheet can save you a lot of time and prevent simple mistakes during the planning phase of your project. It's the kind of foundational knowledge that ensures everything comes together smoothly when it's time to install your beautiful new fixtures.
How to Measure and Verify Your Plumbing Rough-In
Alright, you've got the standard dimensions down. Now comes the moment of truth: grabbing a tape measure and making sure the pipes sticking out of your walls actually match the fixtures you've picked out. This is where the theory becomes reality, and a little careful work now prevents a world of headaches later.
You don't need a complicated set of tools for this, just the basics: a good tape measure, a level, and a pencil. But the most critical tool of all? The manufacturer's specification sheet for every fixture you plan to install. This document is your North Star, detailing every dimension you'll need for a flawless fit.
Mastering the Art of Measurement
Precision is the name of the game here. One of the most common DIY mistakes is measuring from the wrong spot. For instance, a toilet rough-in isn't measured from the bare stud—it's measured from the finished wall. If you forget to account for the 1/2 inch thickness of drywall, you could easily end up with a toilet that simply won't fit.
The same rule applies to height. All your vertical measurements for sinks, shower valves, and tub spouts need to be taken from the finished floor level. If you're standing on the subfloor, you have to add the thickness of your underlayment and the final flooring material, whether it’s tile, vinyl, or wood.
The Specification Sheet Is Your Blueprint
Every single fixture, from a simple faucet to an elaborate shower system, comes with a specification (or "spec") sheet. This is the manufacturer's official installation blueprint, and it's the only source of truth that matters. Learning to read one isn't just a good idea; it's essential.
The spec sheet will show you everything you need to know:
- The exact height and width for your hot and cold water supply lines.
- The precise center-point location for the drain pipe.
- Required clearances around the fixture for it to function correctly and pass inspection.
- Special instructions for trickier installations, like wall-mounted faucets.
Think of the spec sheet as a contract. The manufacturer is saying, "If you put the pipes exactly here, our product is guaranteed to fit." Your job is to make sure your rough-in holds up its end of the bargain.
Always bring your spec sheets to the job site. Go through them one by one, using your tape measure to check every dimension against the actual pipes in the walls and floor. Measure from the center of the toilet flange to the finished wall. Double-check the vanity drain height from the subfloor, remembering to add in your flooring thickness.
This hands-on verification is your last chance to catch a problem before the drywall goes up. It’s the step that ensures all your careful planning pays off, and those beautiful new fixtures you bought will slide into place without a hitch.
How Your Rough-In Dictates Your Fixture Choices
Think of your plumbing rough-in as the permanent foundation for your bathroom or kitchen. Once those pipes are sealed up behind drywall and tile, they establish a fixed grid. This grid doesn't just decide where your sink or toilet will go; it fundamentally determines which models you can even consider.
It’s like setting the foundation for a house before you’ve picked the floor plan. Your options are instantly shaped by that initial footprint.
This becomes painfully obvious when you're shopping for a new toilet. If your home has a 10-inch rough-in, the vast majority of standard 12-inch models are completely off the table—unless you're prepared to break open the floor and move the drain pipe. That one measurement can shrink your list of potential toilets from hundreds to just a handful. This is exactly why you need to know your numbers before you fall in love with a fixture.
Planning for Modern and Specialty Fixtures
The impact of your rough-in goes way beyond standard fixtures. Today's design trends are all about integrated, complex systems that demand very specific, and often non-traditional, plumbing layouts right from the start.
-
Wall-Mounted Faucets: These faucets deliver a clean, minimalist aesthetic by mounting directly to the wall. Unlike a typical faucet that sits on the sink deck, a wall-mount requires the water lines and valve to be installed inside the wall at a very precise height and width. This isn't an afterthought; it has to be planned during the rough-in.
-
Advanced Shower Systems: A multi-function shower, like one from the GRANDJOY FlexiRain collection with body jets and a hand shower, needs far more than one hot and cold line. Each spray component requires its own dedicated plumbing, all roughed-in at specific locations to work as a cohesive system.
Your rough-in isn’t just a technical task—it's the first and most defining design choice you'll make. It can either open the door to exciting, innovative fixtures or limit you to the most conventional options.
Making Room for Smart Home Technology
The push towards smarter homes is also changing what’s required behind the walls. The demand for smart bathroom products is growing, and this trend means you have to plan for more than just water pipes. You can dig deeper into this shift by reviewing plumbing industry statistics.
Smart fixtures—think sensor-activated faucets or shower systems with digital temperature displays—often need both a power source and specialized plumbing connections. These needs have to be anticipated and built into the rough-in.
Planning for this kind of complexity is no longer a luxury. It’s essential for creating a modern, functional space that’s ready for the next generation of home technology. When you design your rough-in with specific fixtures in mind from day one, you turn a technical requirement into a powerful tool for bringing your ultimate design vision to life.
When to Call in a Professional Plumber
While rolling up your sleeves for a DIY project can be satisfying, the plumbing rough-in is one place you really don't want to experiment. This isn't like picking a paint color or hanging a new light fixture. We're talking about the hidden circulatory system of your entire home.
Mistakes made during the rough-in stage are literally buried behind your walls. They won't make themselves known right away. Instead, they can cause silent, catastrophic damage for months or even years before you ever notice a problem.
A drain pipe with the wrong slope will lead to constant clogs. An improperly installed vent pipe could allow dangerous sewer gas to seep into your living space. And even a tiny, slow leak from a bad connection inside a wall can cause thousands of dollars in mold remediation and structural rot repair down the road.
Protecting Your Home and Your Wallet
This kind of work requires a deep understanding of local plumbing codes—complex rules designed to keep your home safe and functional for the long haul. A licensed plumber lives and breathes these codes. They know the exact requirements for pipe sizing, how to vent fixtures correctly, and how to create rock-solid, pressure-tested connections that will pass a building inspection.
Failing that inspection is a nightmare scenario. It means ripping open your brand-new drywall to fix the mistakes before you can move forward.
A pro plumber's expertise isn't just about connecting pipes. It's about spotting potential problems before they happen, guaranteeing everything is up to code, and ensuring the core of your home's water system is fundamentally sound. It’s the ultimate protection for your investment.
For anything beyond a simple fixture swap, especially for complex installations like multi-function shower systems or modern wall-mounted toilets, hiring a pro is non-negotiable. These systems have zero tolerance for error and demand a level of precision that only comes from years of hands-on experience.
It's also worth noting that the plumbing industry is facing a significant shortage of skilled tradespeople, a trend experts expect to continue. This is particularly true for plumbers who specialize in installing today's advanced fixtures. For homeowners, this means booking a qualified expert isn't just a good idea for quality's sake—it might require planning well in advance. You can learn more about trends in the plumbing workforce here.
Ultimately, bringing in a professional for your plumbing rough-in isn't just an added expense. It's essential insurance against future headaches and disasters.
Got Questions? We’ve Got Answers
You're not alone if you still have a few questions floating around. Let's tackle some of the most common things people ask about the rough-in plumbing stage.
How Long Does The Rough-In Stage Take?
For a typical, single bathroom project, a skilled plumber can usually get the rough-in done in one to three days. Of course, this can shift depending on how complex your setup is. That timeframe generally covers getting all the supply lines, drains, and vent stacks right where they need to be before the walls get closed up.
Can I Change My Mind After The Rough-In Is Done?
Technically, yes, but you really, really don't want to. Changing the layout after the plumbing is roughed-in is a surefire way to blow your budget and timeline. It means tearing open freshly installed walls and floors to move pipes, which piles on extra labor and material costs fast.
Think of your layout as being set in stone once the rough-in starts. Finalizing every detail before your plumber begins is the single best way to keep the project running smoothly and affordably.
What Happens During A Rough-In Plumbing Inspection?
This is a crucial checkpoint. A rough-in inspection is when your local building inspector comes to the site to give the new plumbing a thorough look-over. They’re checking to make sure everything hidden inside the walls and floors complies with building and safety codes.
They’ll verify that the pipe sizes, drain slopes, and venting are all correct to prevent leaks, blockages, or sewer gas issues down the road. You can't hang any drywall until you get the green light from this inspection.
When you're ready to choose fixtures that match quality craftsmanship with beautiful design, explore the collections at GRANDJOY. Find the ideal faucets and shower systems to bring your vision to life by visiting GRANDJOY.


Leave a comment
This site is protected by hCaptcha and the hCaptcha Privacy Policy and Terms of Service apply.