

If your once-powerful shower has been reduced to a weak, sputtering mess, you're not alone. That frustrating trickle is a tell-tale sign of buildup, and it's more than just a minor annoyance—it's a problem that needs a fix. Over time, a mix of mineral deposits and grime clogs the tiny nozzles, turning what should be a refreshing experience into a daily disappointment.
Figuring out what's causing the blockage is the first step to getting your shower back to peak performance.
What Causes Shower Head Buildup and Why It Matters
The number one culprit behind a clogged shower head is almost always hard water. If your water supply is rich in dissolved minerals—especially calcium and magnesium—you have hard water. When the water evaporates after your shower, it leaves these minerals behind, which then form a hard, chalky crust we all know as limescale.
This crust doesn't just look bad; it physically blocks the small openings in your shower head. The result? A weak, uneven, or sideways spray that kills your water pressure.
Identifying the Types of Buildup
Before you grab a cleaner, it helps to know what you're up against. Pinpointing the type of gunk on your shower head ensures you use the right method, protecting your fixture's finish in the process. You'll typically run into two main offenders.
- Limescale Deposits: This is that white, crusty, chalk-like stuff that hardens over the nozzles. It’s a direct product of hard water and the most common reason for a clogged shower.
- Soap Scum and Biofilm: This shows up as a filmy, sometimes slimy layer that might look greenish or even pink. It's a gross cocktail of soap residue, body oils, and tiny microorganisms that love damp, warm environments.
Ignoring the problem does more than just ruin your morning routine. Left unchecked, this buildup can permanently damage the internal parts of your shower head and even eat away at its finish—a real concern if you've invested in beautiful surfaces like matte black or brushed gold.
Matching the Buildup to the Right Solution
Not all buildup is created equal, and using the wrong cleaner can be ineffective at best and damaging at worst. This table will help you identify what you're dealing with and choose the safest, most effective cleaning agent for the job.
| Type of Buildup | Primary Cause | Recommended Cleaning Agent | Best For |
|---|---|---|---|
| Limescale (White/Chalky) | Hard water mineral deposits | White Vinegar or Citric Acid | Dissolving tough mineral buildup on most finishes |
| Soap Scum (Filmy/Cloudy) | Soap residue and body oils | Dish Soap and Water or Baking Soda Paste | Cutting through greasy residue without harsh chemicals |
| Biofilm (Pink/Green Slime) | Bacteria and microorganisms | Diluted Bleach or Hydrogen Peroxide | Disinfecting and removing organic growth |
| Rust Stains (Reddish-Brown) | Iron in the water supply | Lemon Juice and Salt Paste | Gently lifting iron stains from metal surfaces |
By correctly matching the problem to the solution, you can restore your shower head's performance without risking damage to its finish or internal components.
The Impact of Hard Water on Your Fixtures
If you're dealing with hard water, you're in the majority. It affects a significant percentage of U.S. households, and the mineral deposits it leaves behind can slash water flow efficiency by a noticeable amount in just a year.
For homeowners with high-performance fixtures, the problem is even more pronounced. Plumbing experts have seen this buildup reduce water pressure significantly, completely negating the benefits of a high-end system.
Think of regular cleaning as essential maintenance, not just a cosmetic chore. It’s a proactive step that preserves your shower’s performance, extends the life of your fixtures, and ensures you can keep enjoying that spa-like experience you paid for.
Cleaning a Fixed Shower Head Right Where It Is
Some of the most beautiful shower heads—those elegant, fixed models mounted on the wall or ceiling—aren't designed to be easily removed. But that doesn't mean you're stuck with weak water pressure. Thankfully, there’s a classic, tool-free trick that dissolves all that gunk right in place.
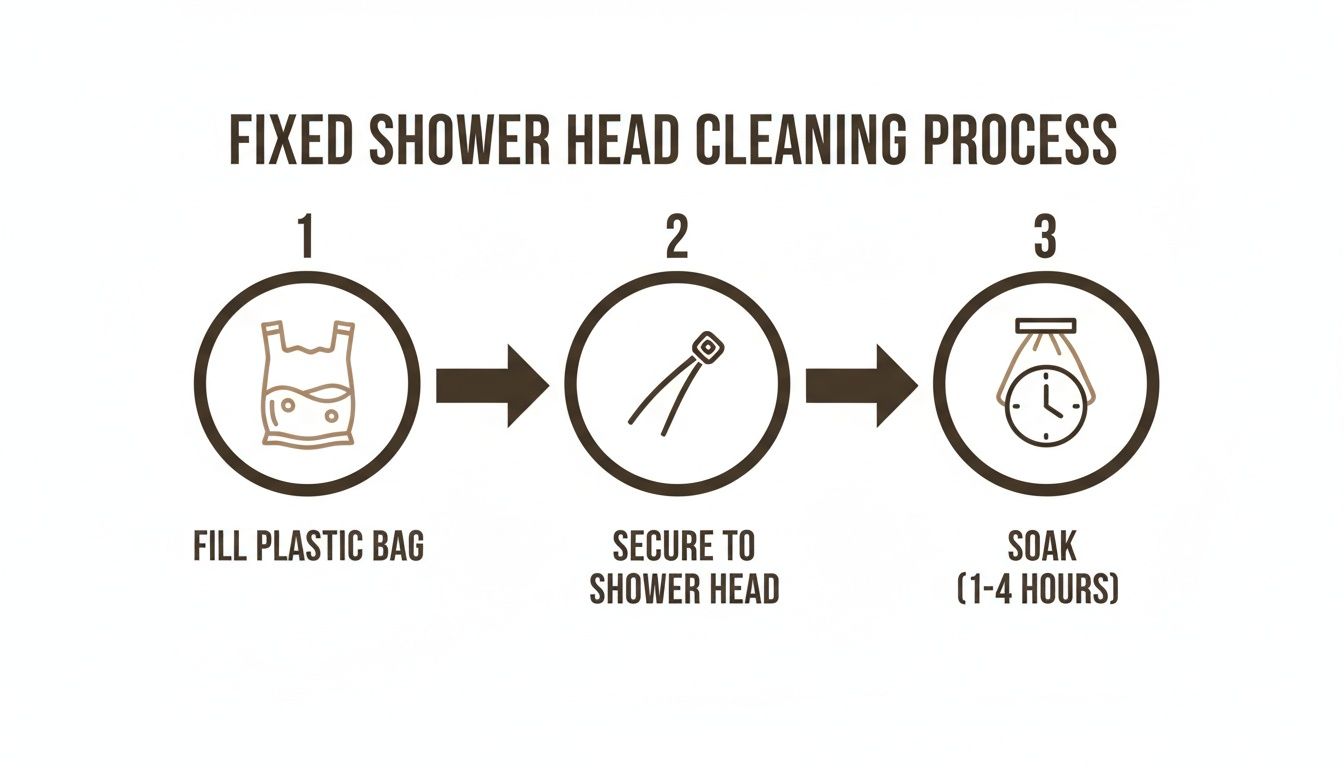
It's often called the "bag method," and it's perfect for getting rid of the hard water minerals and soap scum that are clogging up the works and making your spray go sideways. All it takes are a few things you probably already have: a plastic bag, a rubber band, and some good old-fashioned white vinegar.
Setting Up the Vinegar Soak
The whole idea here is to let the acidic vinegar work its magic on the alkaline mineral buildup. You need to give it time to dissolve the problem away, so the key is getting the face of the shower head fully submerged.
Pour just enough white vinegar into the plastic bag to cover the nozzles. You're not trying to fill the whole bag, just create a small bath for the fixture. Carefully lift the bag and slide it up and over the shower head.
Now, cinch it tight. Wrap the rubber band or zip tie around the shower arm to secure the bag. You want a snug seal so it doesn't leak or slide off. Double-check that all the little spray holes are sitting comfortably in the vinegar.
How Long to Let It Soak
This is where a little patience goes a long way. The right amount of time really depends on how bad the clog is. If you're just dealing with a few mineral spots or a slightly wonky spray, two to four hours should do the trick.
But for a shower head that's been neglected for a while, where the water is barely trickling out, you'll want to go for an overnight soak. Leaving it for eight to twelve hours gives the vinegar the time it needs to break down years of stubborn calcium and magnesium.
A quick word of caution on special finishes, though. While vinegar is perfectly safe for standard chrome and stainless steel, it can be a bit harsh on finishes like brushed gold or matte black if left for too long. For those, play it safe and start with a shorter soak—maybe just 30 to 60 minutes—and check on it before deciding to leave it longer.
Rinsing and Final Touches
Once the soak is done, carefully take off the rubber band, slide the bag away, and pour the cloudy vinegar down the drain. The next step is just as important: flushing everything out.
Crank on the hot water and let it blast for at least a minute. This will force out all the dissolved limescale and loosened debris from inside the nozzles. You should see an immediate and satisfying improvement in the spray pattern.
If you spot any stubborn bits still hanging on, a gentle scrub with an old toothbrush or a soft cloth should be enough to dislodge them. Give it one last rinse with hot water, then wipe the whole fixture dry with a clean cloth. This little step prevents new water spots from forming and really brings back the shine.
When Vinegar Isn't Quite Enough
What if you've done an overnight soak and the flow is still weak? It’s time to bring in some backup. A simple paste made from baking soda and vinegar can power through stubborn buildup without scratching delicate surfaces.
This combination creates a fizzing action that physically lifts away the toughest deposits. It's not just about a better shower, either. The EPA points out that U.S. households waste a staggering amount of water every year from leaks and inefficiencies like clogged fixtures.
Taking It Off: A Deep Clean for Removable Shower Heads
Sometimes, a quick surface clean just won't cut it. When your shower starts sputtering and spraying in every direction but down, it’s time to take the head off for a proper deep clean. This is the best way to get at the really stubborn grime and mineral buildup hiding deep inside, especially for standard, handheld, and rainfall fixtures.
To do this right, you’ll just need a few things: an adjustable wrench, a soft cloth or rag, a bit of new plumber's tape for the re-install, and a bucket or bowl big enough to submerge the shower head completely.
How to Safely Detach Your Shower Head
First things first, let's protect that finish. Before you put a wrench anywhere near your fixture, wrap your soft cloth around the connecting nut where the shower head meets the shower arm. This simple step is crucial for preventing the wrench from scratching or gouging the surface of your fixture.
With the cloth in place, fit your adjustable wrench over it and get a firm grip on the nut. A solid turn counter-clockwise should be enough to break the seal. From there, you can usually unscrew it the rest of the way by hand. If you have a handheld shower, the process is pretty much the same—just detach the hose from both the wall outlet and the handle.
Even when you take the head off, the core principle is the same as the "in-place" method: a good long soak.
This visual is a great reminder that time is your best tool. Giving the cleaning solution enough time to work its magic is what really dissolves all that caked-on mineral gunk, whether the fixture is on or off the wall.
The Deep Soaking Process
Now that the shower head is off, pop it into your bowl or bucket. Pour in enough plain white vinegar to cover it completely. For a really thorough clean that tackles years of buildup, letting it soak overnight—about 8-12 hours—is your best bet. The vinegar will work its way into every nook and cranny, dissolving all that stubborn limescale and calcium.
A quick word of caution for specialty finishes: If your fixture is brushed gold, matte black, or has another unique coating, dial back the soaking time. Stick to just 30-60 minutes. This gives the vinegar enough time to break down minerals without risking any damage to the delicate finish.
Once the soak is done, give the shower head a powerful rinse under warm running water. You should see a ton of loosened debris flush right out.
Going the Extra Mile for a Full Restoration
If you want that brand-new, factory-fresh spray pattern back, a couple of extra moves make all the difference. These tactics hit the hidden spots where clogs love to hang on.
- Tackle the Filter Screen: Peer inside the part of the shower head that connects to the arm. You’ll see a little mesh screen. This is the first line of defense against sediment, and it gets clogged fast. Gently pry it out with a small screwdriver or pliers, give it a good rinse, and use an old toothbrush to scrub away any trapped gunk before popping it back in.
- Clear Every Single Nozzle: Even a long soak can leave a few stubborn mineral plugs behind. Grab a paperclip or a toothpick and gently poke into each individual spray hole. This physically dislodges anything left behind, guaranteeing every jet flows freely.
Reinstalling for a Perfect, Leak-Free Seal
You're almost there. Before putting everything back together, look at the threads on the shower arm and peel off any of the old, shredded plumber's tape.
Now, take your new plumber's tape and wrap it around the threads in a clockwise direction. This is key—wrapping it clockwise ensures the tape tightens down as you screw the shower head on, creating a watertight seal. Three or four wraps are usually perfect.
Finally, screw the shower head back on. Start by hand-tightening it, then use your wrench (with the cloth protector!) for a final quarter-turn to snug it up. Turn on the water, check for leaks, and get ready to enjoy a shower that feels powerful and new again.
Taking Special Care of Modern and High-End Shower Systems
Today's modern shower systems can turn a daily routine into a spa-like experience. But with unique finishes and smart technology comes the need for a more delicate touch. You can't just attack these fixtures with the same harsh chemicals and scrub brushes you might use on a basic chrome head.
The beautiful matte black, brushed gold, and oil-rubbed bronze finishes are particularly vulnerable. Unlike good old-fashioned chrome, these coatings can be easily scratched by abrasive pads or even damaged by acidic cleaners. The key is to be gentle and precise, removing buildup without harming the finish.
Protecting Your Investment: Specialty Finishes
When you're dealing with a specialty finish, think "soft and gentle." That means no scouring pads, no steel wool, and definitely no coarse paper towels—they can all create tiny micro-scratches that will dull the surface over time. Your best friend here is a soft microfiber cloth for both cleaning and drying.
Chemicals are the other big enemy. Steer clear of bleach, ammonia-based products, or aggressive commercial descalers. These can permanently discolor the finish or eat away at the protective lacquer that keeps it looking new.
For routine cleaning, all you really need is a simple mix of warm water and a few drops of mild dish soap. Just apply it with your microfiber cloth, rinse well, and immediately dry the fixture to prevent water spots. It's a surprisingly effective way to cut through soap scum without putting that gorgeous finish at risk.
Honestly, the best approach for these premium finishes is prevention. Wiping the shower head down with a dry microfiber cloth after every shower takes about ten seconds, but it's the single best thing you can do to stop mineral deposits from ever getting a foothold.
Navigating Integrated Electronics
Smart showers with built-in LED lights, speakers, or digital temperature displays add another wrinkle. Everyone knows water and electronics don't mix, so you have to be extra careful to avoid sending moisture where it doesn’t belong.
This is where the "in-place" bag method really shines. If you need a vinegar soak to break up stubborn mineral deposits, secure the bag tightly around the faceplate only. You want the water level just high enough to cover the nozzles but well away from any electronic displays, seams, or control buttons.
- Never fully submerge an electronic shower head. It’s just not worth the risk.
- Wipe, don't spray. When cleaning around screens or buttons, use a damp cloth. Never spray cleaner directly onto the unit.
- Dry everything meticulously. Pay special attention to any seams or openings where water could seep inside and fry the circuitry.
A Gentle but Powerful Solution for Buildup
Even with the best care, some buildup is bound to happen, especially if you have hard water. For high-quality, corrosion-resistant brass fixtures, there's a fantastic trick using a simple kitchen staple. Boiling a detachable brass head in water with a solution of lemon juice can be incredibly effective.
The natural citric acid can break down mineral deposits, outperforming some chemical cleaners. This is a perfect method for high-end fixtures where you need to protect the integrity of the material.
By following these more thoughtful techniques, you'll know exactly how to clean shower head buildup without damaging your investment. A little extra care ensures your luxury system not only performs perfectly but also continues to be a stunning centerpiece in your bathroom for years to come.
Keep Your Shower Flowing: A Simple Maintenance Plan to Prevent Future Buildup
There’s a real satisfaction in restoring a clogged shower head to its former glory, but let’s be honest—it’s better if you never have to deal with that weak, sputtering spray in the first place. The best way to handle mineral buildup is to stop it before it starts. With a few simple habits and a consistent schedule, you can keep limescale and grime from ever getting a foothold.
Moving from reactive cleaning to proactive maintenance is the smartest way to protect your investment. This approach prevents the very conditions that allow gunk to form, which is especially critical for preserving the delicate finishes on high-end and luxury fixtures.
Daily Habits That Make a Real Difference
The most effective preventative tactics are often the smallest ones you build into your daily routine. These quick actions interrupt the cycle of buildup before it even has a chance to begin.
- Wipe It Down After Every Use: This is, without a doubt, the single best habit you can adopt. Take just 10 seconds after showering to wipe the shower head dry with a soft microfiber cloth. This simple step removes water droplets before they evaporate and leave behind those stubborn mineral deposits.
- Keep the Air Moving: Good ventilation is your best friend in the fight against moisture. Run your bathroom’s exhaust fan during your shower and for about 20 minutes afterward. This helps moisture evaporate much faster, giving minerals less time to settle on your fixtures.
These small daily efforts create an environment where buildup simply can't thrive, dramatically cutting down on how often you'll need to do a deep clean. It’s a perfect example of a little effort now saving you a lot of work later on.
A Long-Term Strategy for Hard Water Headaches
If you live in a hard water area, daily wipes might not be enough to fend off the relentless march of calcium and magnesium deposits. For those situations, a more robust, long-term solution can be a game-changer.
The ultimate defense is installing a water softening system. These systems remove the hard minerals from your water supply before they even get to your pipes. This doesn't just protect your shower head; it extends the life of all your plumbing and appliances, from your washing machine to your coffee maker.
A water softener gets to the root cause of limescale. It’s an upfront investment, but it completely eliminates the main source of clogs, protects your expensive finishes, and saves you countless hours of cleaning all over the house.
Your Shower Head Maintenance Calendar
The key to effective prevention is consistency. By following a straightforward schedule, you can give your shower head the right attention at the right time, stopping small spots from turning into major blockages. Sticking to a routine makes knowing how to clean shower head buildup a skill you'll rarely need to use.
This practical calendar breaks down maintenance into easy, manageable tasks so it never feels like a chore.
| Frequency | Task | Purpose | Recommended For |
|---|---|---|---|
| Weekly | Quick Wipe & Spray | Spritz the nozzles with a 1:1 vinegar-water solution and wipe dry. | All users, especially those with specialty finishes. |
| Monthly | Light Descaling Soak | Do a quick 30-minute vinegar soak using the "in-place" bag method. | Homes in moderate to hard water areas. |
| Quarterly | Filter Screen Check | If you can, remove the filter screen and rinse away any trapped sediment. | Essential for everyone to prevent hidden clogs that kill pressure. |
| Bi-Annually | Full Deep Clean | Remove the shower head for an overnight soak and manually clear every nozzle. | A must for homes with very hard water or chronic low pressure. |
By adopting this schedule, you'll shift from fighting clogs to preventing them entirely. A few minutes of simple maintenance each month ensures your shower continues to deliver that powerful, refreshing spray you paid for, preserving its performance and its looks for the long haul.
Answering Your Top Shower Head Cleaning Questions
Even with the best instructions, you might run into a few specific questions when you're elbows-deep in cleaning your shower head. Let's tackle some of the most common ones we hear from homeowners. Think of this as your go-to FAQ for getting the job done right, ensuring you get fantastic results without any last-minute surprises.
How Often Should I Clean My Shower Head in a Hard Water Area?
If your home has hard water, staying ahead of mineral buildup is key. You can't just wait for a problem to appear.
For regular upkeep, I suggest a quick spritz and wipe-down with a 50/50 vinegar and water solution about once a month. This little bit of preventative maintenance keeps those hard water minerals from settling in and becoming a real headache.
As for a full deep clean—the kind where you soak the fixture—plan on doing that every three to four months. Of course, the real expert is your shower itself. If you start seeing a weak or erratic spray pattern, that’s your shower telling you it’s time for a cleaning, no matter what the calendar says.
Is It Safe to Use Harsh Chemical Cleaners Like Bleach?
In a word: no. We strongly recommend steering clear of harsh chemical cleaners like bleach, ammonia, or aggressive commercial descalers. It might feel like you're bringing out the big guns to solve a tough problem, but you're likely to do more harm than good.
These chemicals are just too tough on your fixture. They can eat away at the rubber gaskets and seals inside the shower head, which leads to leaks. Even worse, they can completely ruin premium finishes. A splash of the wrong cleaner can strip or permanently discolor beautiful finishes like matte black, brushed gold, and oil-rubbed bronze.
It's best to stick with gentle, natural cleaners. White vinegar and lemon juice are your best friends here. They do an excellent job dissolving mineral deposits without putting your fixture’s finish or internal parts at risk. It's the safest and most effective approach for long-term care.
My Shower Head Is Still Clogged After Cleaning. What Now?
That's a frustrating situation, for sure. You've soaked it, you've scrubbed it, and the water pressure is still dismal. When this happens, the clog usually isn't on the surface nozzles anymore. The next culprit to check is the filter screen.
This tiny mesh screen sits right where the shower head connects to the pipe coming out of the wall. Its job is to catch sediment and debris before it gets into the fixture, and it can get clogged up over time. Just unscrew the shower head again, and you should be able to gently pry the screen out. Give it a good rinse and a scrub with a soft brush to clear out any gunk.
If cleaning that little screen still doesn’t do the trick, the blockage is probably deeper in your plumbing. At that point, it’s probably time to call in a professional plumber who can diagnose what's going on inside the pipes.
Will Vinegar Damage the Electronics in My Smart Shower Head?
This is a really important question for anyone with a modern, high-tech fixture. When your shower head has LED lights, Bluetooth speakers, or digital controls, you absolutely need to be more careful.
Never, ever submerge the entire fixture in liquid. The best and safest way to clean a smart shower head is with the "in-place" bag method. When you attach the bag of vinegar solution, make sure the liquid only covers the faceplate and nozzles. Keep the water level well below any seams, buttons, or digital displays.
This approach lets you descale the important parts without getting any moisture near the sensitive electronics. Once the soak is done, just wipe everything down with a damp microfiber cloth, and your smart shower will be working—and looking—as good as new.
At GRANDJOY, we believe maintaining your luxury fixtures should be a simple, worry-free process. Our collections are built with premium materials to ensure a superior shower experience that lasts. To find the perfect centerpiece for your bathroom, explore our range of high-quality shower systems at GRANDJOY.


Leave a comment
This site is protected by hCaptcha and the hCaptcha Privacy Policy and Terms of Service apply.