

Tired of your standard-issue shower head? Swapping it out for a rain shower head is one of the quickest, most satisfying DIY projects you can tackle to completely change the feel of your bathroom.
If you're just replacing a standard wall-mounted fixture, the job is often as simple as unscrewing the old head, wrapping the shower arm's threads with new seal tape, and spinning on the new one. It's a small change that makes a huge difference, turning a routine shower into a daily luxury.
Turn Your Everyday Shower Into a Spa-Like Escape

A rain shower head isn't just a piece of plumbing; it's an intentional upgrade that brings a bit of the spa experience right into your home. It’s one of those rare projects that delivers a huge payoff for a relatively small amount of effort, creating a personal sanctuary where you can wash away the day's stress. There's nothing quite like the feeling of a warm, gentle downpour to get your morning started or to help you unwind at night.
This guide will walk you through exactly how to install a rain shower head with the confidence of a pro. We'll cover everything from the basic wall-mounted swap to the more complex, but totally achievable, ceiling-mounted installation.
Why It's an Upgrade Worth Making
Opting for a rain shower fixture brings a few key benefits that go far beyond just looks. It genuinely improves your daily routine and the overall feel of your bathroom.
- A More Relaxing Shower: The wide, gentle stream of water feels like natural rain, which is incredibly calming and can help melt away tension.
- Better Water Coverage: Forget twisting and turning to get rinsed. The larger head size creates a broad spray that covers your whole body for a more complete, immersive experience.
- An Instant Style Update: A rain shower head immediately gives your bathroom a clean, modern, and high-end look.
This isn't just a niche trend, either. Rain shower heads are a fast-growing part of the bathroom fixture market. Projections show the rain shower heads market size could hit USD 10.8 billion by 2033, which just goes to show how many homeowners are chasing that spa-like feeling.
Think of this project as more than just a fixture swap. It's a real investment in your daily well-being and your home's appeal. With the right steps, a perfect, leak-free installation is well within your grasp.
Whether you've done a dozen home projects or this is your first one, we’ll give you the practical, no-nonsense advice you need to get the job done right. The result will be a beautiful, functional upgrade you’ll appreciate every single day.
Getting Your Tools and Materials Ready
Before you even think about unscrewing your old shower head, let's talk about prep work. A smooth, satisfying installation versus a frustrating afternoon of hardware store runs often comes down to having everything you need ready to go. A little planning now sets you up for a professional, leak-free finish later.
Your absolute first move is to turn off the water. Find the local shut-off valve for your shower or bathroom; if there isn't one, you'll need to use the main water shut-off for the entire house. Once it's off, turn on the shower faucet to let any water left in the pipes drain out completely.
Next, protect your workspace. Toss an old towel or a drop cloth over the shower floor. This simple trick does two things: it prevents you from scratching the tub or tile if you drop a wrench, and it keeps tiny screws or washers from vanishing down the drain.
Your Core Toolkit
Whether you're doing a simple swap or a more involved project, a few tools are non-negotiable. Getting these basics together will cover about 80% of what you need for most installations.
- Adjustable Wrench or Channel-Lock Pliers: This is your go-to for loosening the old fixture and gently tightening the new one.
- Thread Seal Tape (Plumber's Tape): This is non-negotiable. You absolutely need it to create a watertight seal on every threaded connection.
- A Soft Cloth or Rag: Always wrap this around the fixture's finish before you put a wrench on it. A simple step to prevent ugly scratches.
- Utility Knife: Great for carefully cutting away any stubborn old plumber's tape or caulk.
With just these four items, you're pretty much set for a standard wall-mounted replacement. But if you’re aiming for that luxurious ceiling-mounted setup, your shopping list gets a bit longer.
Pro Tip: A well-organized workspace is a safe and efficient one. Lay your tools out on the drop cloth where you can see them. No more fumbling around a wet floor trying to find what you need.
Essential Tools and Materials Checklist
To make it even clearer, here’s a quick breakdown of what you'll need for each type of installation. The wall-mount is a straightforward plumbing task, while the ceiling-mount job dips into light construction.
| Item | Wall-Mount Installation | Ceiling-Mount Installation |
|---|---|---|
| Rain Shower Head Kit | ✓ | ✓ |
| Adjustable Wrench | ✓ | ✓ |
| Thread Seal Tape | ✓ | ✓ |
| Soft Cloth/Rag | ✓ | ✓ |
| Stud Finder | ✓ | |
| Drywall Saw | ✓ | |
| Drill & Bits | ✓ | |
| Pipe Cutter (PEX/Copper) | ✓ | |
| Safety Goggles | ✓ | |
| Drop Cloth | ✓ | ✓ |
As you can see, the ceiling-mount project requires a more serious toolkit for working overhead and running new plumbing lines through the ceiling.
Advanced Tools for Ceiling-Mount Projects
If you're installing a true ceiling-mounted rain shower, you're graduating from basic plumbing to a bit of light construction. This means you'll need a few more tools to open up the ceiling and securely run new water lines.
- Stud Finder: Don't guess. You need this to find the ceiling joists that will support the new plumbing and the weight of the fixture.
- Drywall Saw: This is for making a clean, manageable opening in the ceiling right where you need it.
- Drill with Assorted Bits: You'll need this for drilling pilot holes and securing the new plumbing supports to the joists.
- PEX or Copper Tubing Cutter: Your choice of cutter will depend on the type of pipe you're using to extend the water supply.
- Safety Goggles: When you're cutting drywall above your head, this is a must. Protect your eyes from falling dust and debris.
Check Your Plumbing and Water Pressure
Before you buy anything, take a quick look at what you’re working with. Nearly all standard showers use a 1/2-inch threaded shower arm that comes out of the wall, which is what most replacement heads are designed for.
Water pressure is the other big factor. To get that signature, all-encompassing spray from a rain shower, you need good pressure—ideally somewhere between 40 and 60 PSI. If your home is known for weak showers, you might want to test your pressure before you commit to a large-format shower head.
Taking the time to do this prep work is what separates a DIY success from a DIY disaster. By gathering your tools, protecting your space, and understanding your plumbing, you’re ready for a smooth, confident installation.
Installing a Wall-Mounted Rain Shower Head
If you're looking for a quick bathroom upgrade with a big impact, swapping out your old shower head for a wall-mounted rain model is a fantastic weekend project. It’s one of the most accessible DIY jobs out there because you’re not touching any of the plumbing hidden behind the wall. We’ll walk through the process, paying close attention to the little details that make the difference between a leaky connection and a perfect, spa-like shower.
Ultimately, this whole process boils down to creating a clean, watertight seal. It’s all about carefully removing the old fixture, prepping the threads properly, and securing the new one without overdoing it. Patience and a light touch are your best tools here.
Beginning with a Clean Slate
First things first, let's get that old shower head out of the way. Grab an adjustable wrench or some channel-lock pliers and get a firm grip on the base of the head where it meets the shower arm. Here's a pro tip: always wrap a soft rag around the fixture before putting a wrench on it. It’s a simple habit that prevents scratching the finish, whether you’re removing an old part or installing a new one.
Turn the wrench counter-clockwise. Most of the time, the old head will loosen up without much of a fight. If it’s really stuck on there from years of mineral buildup, just apply slow, steady pressure. Whatever you do, don't jerk the wrench—that’s a good way to damage the shower arm or, even worse, the pipe fitting inside the wall.
With the old head gone, you’ll see the exposed threads of the shower arm. They’re probably caked with old, shredded plumber's tape and some crusty deposits. Cleaning this up is non-negotiable. Use a small wire brush or even the edge of a utility knife to carefully scrape off every last bit of the old gunk.
Your goal here is to get those threads back to bare metal. A perfectly clean surface is the only way new thread seal tape can do its job and create a watertight connection. Any leftover debris is just asking for a slow, frustrating leak down the line.
The Art of Applying Thread Seal Tape
Now for the step that truly separates a pro job from an amateur one: applying the thread seal tape (you probably know it as plumber’s tape). This stuff looks simple, but the technique is everything. It works by filling the tiny gaps between the threads to create a seal that water can't penetrate.
Hold the shower arm and start wrapping the tape around the threads in a clockwise direction. This is absolutely critical. If you wrap it the wrong way (counter-clockwise), the tape will just bunch up and unravel when you screw on the new head, making it completely useless.
Keep a little tension on the tape as you wrap so it sinks into the threads. Overlap each pass by about half the width of the tape and go around three to four full times. That’s the sweet spot. Too little tape won’t create a good seal, but too much can actually prevent you from tightening the new fixture properly.
Attaching the New Fixture
With your threads prepped like a pro, you’re ready to install the new head. Many rain shower kits, especially those with a high-arc design, come with a matching new shower arm. If that's what you have, go ahead and unscrew the old arm from the wall first, then apply new tape to both ends of the new arm before installing it.
If you're just replacing the head on the existing arm, it's even easier.
- Hand-Tighten First: Always, always start by threading the new shower head on by hand. This gives you a feel for the threads and helps you avoid cross-threading. It should spin on smoothly with no real resistance.
- A Gentle Final Turn: Once it’s hand-tight, cover the base with your cloth and use the wrench for a final quarter- to half-turn. You just want it to be snug. Over-tightening is a classic mistake and can easily crack the fitting or ruin the washer inside.
- Position the Head: Give it a final adjustment to get the angle just right.
That hand-tightening step is your best defense against cross-threading, which is what happens when the threads don't line up properly. If you feel it binding up right away, stop. Back it off and try again. Forcing a cross-threaded connection will wreck the threads on both the head and the arm, and you’ll be heading back to the hardware store. Take your time, get it right, and you'll be enjoying that new rain shower in no time.
Mastering a Ceiling-Mounted Installation
Moving from a standard wall-mounted fixture to a ceiling-mounted rain shower is a serious upgrade. It’s a project that definitely shifts from a simple fixture swap into the territory of light plumbing and structural work, but the payoff is that incredible, spa-like downpour. For a confident DIYer, it's absolutely worth the effort.
The whole project hinges on running a new water supply line from your existing shower valve up through the ceiling. This means you'll need to plan carefully, get familiar with your home's framing, and be meticulous about making every connection completely leak-proof.
Let's walk through what it really takes to get this done right.
Locating a Secure Anchor Point
Before you even think about cutting, your first job is to find a solid place to mount the new fixture. A ceiling-mounted shower head, plus the plumbing it connects to, has to be anchored directly to a ceiling joist—one of the heavy wooden beams that frame your ceiling.
Grab an electronic stud finder and scan the ceiling right above where you envision the shower head. Use a pencil to mark where the joists are. You're looking for a spot right alongside a joist, as that's where you'll secure the new plumbing. Whatever you do, never hang a shower head from drywall alone. It simply can’t take the weight and will eventually fail, causing a huge, wet mess.
Once you’ve pinpointed a joist, you're ready to create an access point. This is where many people decide to call a pro. Using a drywall saw, carefully cut a small, clean square out of the ceiling next to the joist. A hole around 6 to 8 inches should give you enough room to work without creating a massive repair job for yourself later.
Safety First: Always wear safety goggles when cutting into a ceiling. You'll have a shower of drywall dust and debris, and eye protection is non-negotiable. Keeping a shop vac nearby is also a pro move for managing the dust as you go.
Running the New Plumbing Line
With your access hole open, the next step is extending the water line. You'll be running a new pipe from the shower valve up to the ceiling. The two best materials for this job are PEX and copper.
- PEX (Cross-linked Polyethylene): This is a go-to for many retrofit projects. It's a flexible plastic tube that's easier to snake through walls and around framing without needing a ton of fittings. You'll make connections with either crimp or push-to-connect fittings, both of which are extremely reliable when done correctly.
- Copper Pipe: The classic choice. Copper is incredibly durable but requires soldering joints with a torch or using compression fittings. Its rigidity can make it a real challenge to maneuver in the tight, awkward spaces you'll be working in.
No matter which material you choose, the new line has to be fastened down. Use pipe straps to anchor the pipe to joists or other framing every 32 to 48 inches. This is critical—it stops the pipe from vibrating when water runs through it, which prevents stress on the joints that can lead to leaks down the road.
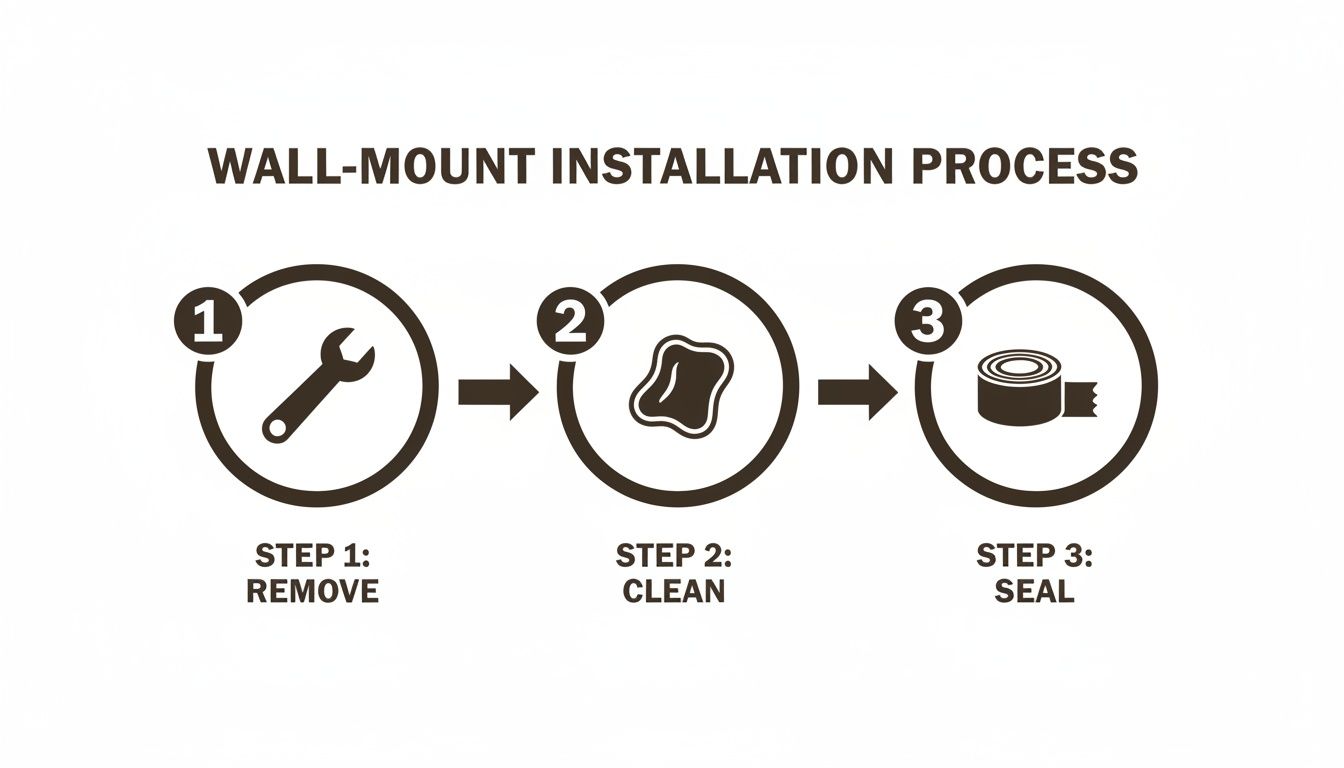
While this image shows a basic wall-mount, the core principles—remove, clean, and seal—are universal. Every connection, whether in the wall or in the ceiling, needs to be clean and perfectly sealed to prevent leaks.
Making the Final Connections
At the ceiling, you’ll install a special fitting called a "drop-ear" elbow. It’s a game-changer because it has little wings with screw holes, allowing you to mount it directly to the side of the joist. This creates a rock-solid, threaded anchor for the shower arm that will hold your new rain shower head.
With the plumbing run and secured, it’s time to connect it to the shower valve. This can be the trickiest part of the project and often requires opening up the wall to get clear access. If you feel even a little hesitant here, this is the perfect moment to tag in a licensed plumber to make that final tie-in.
Before you even think about patching the ceiling, you have to do a leak test. Turn the main water back on and open the shower valve to send water through the new line. Get a flashlight and carefully inspect every single joint and fitting for the tiniest bead of moisture. Finding and fixing a small drip now is a minor inconvenience; finding it after the ceiling is patched and painted is a disaster.
Once you’re 100% confident everything is watertight, you can finally install the ceiling-mount shower arm and the rain head. Wrap the arm's threads with Teflon tape, screw it into the drop-ear elbow, and then attach the head. The very last step is patching the drywall, which brings back that clean, seamless look of a professional installation.
Final Checks for a Leak-Free Finish
You’ve done the hard work—the old fixture is gone, and your beautiful new rain shower head is in place. But don't start the celebration just yet. This final stage is all about making sure every connection is rock-solid and completely leak-free for the long haul. A little patience and a thorough check now will save you a world of headaches and potential water damage down the road.
First things first, let's bring the water back online, but slowly. Head back to your main shut-off valve (or the local one for the shower) and crack it open just a quarter of the way. This gradual approach lets the pipes fill up without a sudden jolt of pressure that could shock your new connections. Give it a minute, then you can open the valve the rest of the way.
The Meticulous Leak Inspection
With the water supply fully restored, it’s time to play detective. Grab a dry paper towel and a bright flashlight—your phone's light works great for this. You're going to want to carefully examine every single connection point you touched. Pay special attention to the base where the shower head meets the arm and where the arm enters the wall or ceiling.
Press that dry paper towel firmly against each joint. Even the tiniest, slowest drip will leave a tell-tale wet spot on the paper, revealing a leak you might have missed with a quick glance. If everything stays bone-dry after a few minutes of inspection, you’re in fantastic shape.
Taking your time here really matters. The global shower heads market hit an impressive USD 13,308.3 million in 2024, with fixed models like rain showers leading the charge. That number represents a massive wave of homeowners upgrading their bathrooms, and a proper, leak-free installation is what separates a great upgrade from a future problem.
Troubleshooting Common Installation Issues
What happens if you do find a drip? Don't panic. Most post-installation leaks are minor and usually have a simple fix. Here’s how to tackle the most common culprits.
- A Drip at the Shower Head Connection: This is the most common issue by far, and nine times out of ten, it’s the thread seal tape. The fix is straightforward: turn the water off, unscrew the head, and carefully clean off the old tape. Re-wrap the threads with fresh tape, going clockwise three to four times, and reinstall the head until it’s snug.
- Low Water Pressure: If the water flow feels more like a drizzle than a downpour, check the filter screen. It’s a small mesh screen located right inside the shower head's connector. Sometimes, installation can knock debris loose in the pipes, which then gets caught here. Just unscrew the head, pop the screen out, rinse it clean, and put it all back together.
- Leak at the Shower Arm Escutcheon: Water seeping out from behind that decorative plate at the wall is a more serious sign. It often means the threaded elbow inside the wall is compromised. This isn't a simple fix and usually requires calling in a professional.
A crucial piece of advice: resist the urge to just crank down on a leaky fitting with a wrench. Over-tightening is a leading cause of cracked fittings and stripped threads. That can turn a small drip into a major, expensive repair. The solution is almost always a better seal, not more brute force.
Creating the Final Watertight Seal
Once you're 100% confident that all your connections are dry, there’s one last finishing touch: sealing the escutcheon plate. That’s the trim piece covering the hole where the shower arm comes out of the wall. A clean bead of silicone caulk gives it a professional look and, more importantly, creates a barrier against moisture.
Grab a tube of waterproof kitchen and bath silicone caulk. Apply a thin, continuous bead around the top and sides of the escutcheon, right where it meets the tile. Leave the bottom edge open. This is a pro tip—it allows any condensation or moisture that might find its way behind the plate to drain out instead of being trapped in your wall.
Smooth the bead with a wet fingertip or a caulk finishing tool for a clean, seamless line. Let it cure according to the manufacturer's directions, and that’s it. Your installation is officially complete, protected, and ready to enjoy.
Your Top Rain Shower Installation Questions, Answered
Anytime you take on a new project around the house, a few questions are bound to pop up. When it comes to installing a rain shower head, you're not alone in wondering about the specifics. We've pulled together the most common questions we hear and provided some straightforward, practical advice to get you through the job with confidence.
Getting these details sorted out upfront can be the difference between a quick, successful upgrade and a frustrating afternoon. Let's tackle those "what ifs" before they turn into "oh nos."
Do I Need to Rework My Plumbing for a Rain Shower Head?
That really depends on what you're installing. For a standard wall-mounted rain shower head, the answer is almost always no. These are designed to simply screw onto your existing shower arm, making it a simple swap that most anyone can handle. No need to open up the walls.
However, if you're dreaming of a true ceiling-mounted rain shower, that's a whole different ballgame. This kind of installation requires a plumber to run new water lines up through the ceiling and secure them to the joists. It's a much bigger job.
One other thing to keep in mind is your home's water pressure. Rain shower heads are big, and they need decent pressure to deliver that drenching, spa-like experience. For the best performance, you'll want to be somewhere in the 40 to 60 PSI range. If your current shower feels more like a light drizzle, a bigger head might not give you the downpour you're hoping for.
Can I Put a Rain Shower Head in a Bathroom with a Low Ceiling?
You absolutely can, but you'll need to be smart about which model you choose. A ceiling-mounted head is probably off the table—it would just make the space feel too cramped and claustrophobic.
Your best bet is a wall-mounted model combined with an S-shaped or adjustable-height shower arm. These accessories are game-changers for low-clearance bathrooms. They’re specifically designed to lift the shower head several inches higher, creating that overhead rain effect without requiring a high ceiling. Just be sure to measure the distance from your current shower arm to the ceiling before you buy an extension arm to make sure it will fit.
My New Shower Head Has Terrible Water Pressure. How Do I Fix It?
It's a huge letdown when your brand-new shower head sputters, but don't worry—it’s usually an easy fix. There are three likely culprits.
- The Flow Restrictor: To meet water conservation standards, most new shower heads come with a small plastic disc inside. You can often remove it, but be sure to check your local building codes first.
- Clogged Filter Screen: During installation, it's common for sediment or old pipe debris to get knocked loose and clog the small mesh screen right where the head connects. Just unscrew the head, pop out the screen, and give it a good rinse.
- Valves Aren't Fully Open: It might sound simple, but make sure the water valve for the shower and your home's main water supply are both turned all the way on.
If none of that works, you might have a bigger pressure problem in your home's plumbing that needs a professional opinion.
A leak-free seal is all about proper technique, not brute force. The secret lies in wrapping the plumber's tape in the correct direction and avoiding the common mistake of over-tightening the connections.
What's the Best Way to Stop Leaks at the Connection?
Getting that perfect, watertight seal is what every DIYer aims for. The key is using plumber's thread seal tape the right way.
You need to wrap the tape 3-4 times clockwise around the male threads of the shower arm. Why clockwise? Because when you screw on the new shower head (also clockwise), the tape tightens down into the threads instead of bunching up or unraveling.
When you're ready to attach the head, always start by hand-tightening to make sure you don't cross-thread it. Once it’s snug, use a wrench protected by a soft cloth to give it one last quarter-turn. It's tempting to really crank on it, but don't. Over-tightening is a classic mistake that can crack the fittings and cause the very leak you were trying to prevent.
Ready to transform your shower with a fixture that combines elegance and performance? Explore the curated collections at GRANDJOY, where you'll find premium, cUPC-certified rain shower systems designed for a flawless installation and a luxurious experience. Discover the perfect model for your bathroom upgrade.


Leave a comment
This site is protected by hCaptcha and the hCaptcha Privacy Policy and Terms of Service apply.