

How to Remove Aerator: how to remove aerator from your faucet safely and quickly
A clean faucet aerator is the unsung hero of a smooth, splash-free stream of water. So, when your faucet starts sputtering, the pressure drops, or the stream sprays in every direction, it's a safe bet that mineral deposits have clogged up the works. Learning how to pop that aerator off for a quick cleaning is a surprisingly simple fix that gets your faucet running like new again.
Why and When You Should Remove a Faucet Aerator
That little piece at the tip of your faucet spout does more than just look pretty. The aerator is designed with fine mesh screens to mix air into the water, which creates that soft, even stream we expect. But those same screens are perfect traps for sediment, calcium, and other gunk from the water supply. Over time, that buildup is what throttles your water pressure and makes the stream go wild.
Keeping your fixtures running smoothly just requires a little routine maintenance. For most homes, cleaning the aerator every six months is plenty. But if you're in an area with hard water, you'll probably find yourself needing to do it more often—think every three to four months—to stop that buildup from hardening into a real problem.
Signs Your Aerator Needs Attention
Recognizing the early signs can save you from the headache of a faucet that barely trickles. Here's a quick reference guide to help you spot the symptoms before they get out of hand.
| Symptom | Common Cause | Action Required |
|---|---|---|
| Weak Water Flow | The most obvious sign. Mineral deposits and sediment are blocking the mesh screens inside the aerator. | Remove and clean the aerator. If it's heavily corroded, a replacement is needed. |
| Sputtering or Erratic Spray | Water is being forced around partial blockages, causing it to spray sideways instead of flowing in a uniform stream. | Disassemble the aerator and thoroughly clean each part of the screen and housing. |
| Visible Mineral Deposits | A white, crusty buildup (limescale) is forming on the outside of the faucet tip. | This is a clear visual cue. The inside is likely much worse. It's time to remove it for a deep clean. |
Tackling this quick task is one of the most common entry points into DIY plumbing. It’s no surprise that the global faucet aerator key market is projected to grow, boosted by a wave of home renovations. With millions of households getting their hands dirty with DIY projects each year, faucet maintenance is a great place to start.
Getting the Right Tools for the Job
Before you dive in, taking a minute to get your tools ready will make this a five-minute fix instead of a frustrating ordeal. For most standard aerators—the kind you can clearly see and grab at the end of the spout—you won't need anything fancy.
Grab a pair of adjustable pliers and something to protect the faucet’s finish. A few wraps of painter’s tape around the aerator housing, a thick rubber band, or even a doubled-up piece of cloth will do the trick. This is a crucial step; the metal teeth on pliers will chew up a chrome finish in seconds. The whole idea is to get a solid grip without leaving a single scratch behind.
What to Do About Different Aerator Types
Of course, not all faucets are that straightforward. A lot of modern designs have hidden or recessed aerators, which you might hear called a cache aerator. These are tucked up inside the faucet spout, so there's nothing for your pliers to grab onto.
For these hidden styles, an aerator key is an absolute must-have. Don't even think about trying to jam a screwdriver or knife in there—you'll just mangle the plastic aerator and possibly damage the faucet threads.
These keys are simple plastic tools that look like little rings with teeth designed to fit perfectly into the aerator's notches. Your faucet probably came with one, but they're tiny and easy to lose. If yours is long gone, you can find universal kits at any hardware store. They usually include a few different sizes, making them a smart, cheap addition to your plumbing toolkit.
Taking Off a Standard, Threaded Aerator
Let's start with the most common type of aerator out there: the standard, externally threaded kind. This is the one you can clearly see and grab right at the tip of your faucet. Getting it off is usually a quick job—less than a minute, really—if you use the right technique instead of just brute force.
First thing’s first: protect the finish. This is non-negotiable, especially on nicer faucets with delicate chrome, matte black, or brushed gold surfaces. Metal pliers will chew up that finish in a heartbeat.
Wrap the aerator housing with a soft cloth, a couple of thick rubber bands, or a few layers of painter's tape. This simple step is the difference between a clean job and a faucet covered in scratches.
The "Steady-Does-It" Turn
Once your faucet is protected, grab your adjustable pliers and get a firm grip on the wrapped aerator. You want it snug, but don’t try to crush it. The goal here is steady, even pressure.
Turn the pliers counter-clockwise. Think: "righty-tighty, lefty-loosy."
You’re not trying to yank it off in one go. Apply slow, consistent force. What you’re listening for is a little “pop” or feeling a slight release—that’s the moment the threads break free from any mineral gunk or the old washer’s seal. If it doesn't move right away, don't just muscle it harder. That's how you can strain the faucet's internal parts or even loosen the whole fixture from the sink.
One of the biggest mistakes people make is using short, jerky motions. That’s a great way to strip the aerator's threads or damage the faucet. A slow, sustained turn is always safer and works much better to break a stubborn seal.
After it breaks loose, the hard part is over. You can almost always unscrew it the rest of the way by hand.
Just be ready for a little bit of water to dribble out, possibly along with some gross-looking sediment that was trapped inside. Always keep a small towel right under the spout to catch the mess. It turns a potentially frustrating task into a quick, satisfying fix.
Troubleshooting a Stuck or Hidden Faucet Aerator
Every once in a while, what seems like a simple, two-minute job turns into a real headache. You go to twist off the aerator, and... nothing. It’s completely stuck. More often than not, the culprit is years of mineral buildup from hard water, acting like a cement that has fused the aerator to the faucet spout.
Before you grab a giant pair of pliers and apply more muscle, take a breath. Brute force is the fastest way to permanently damage your faucet’s finish or even warp the spout itself. A little patience and a smarter approach will get the job done without any collateral damage.
Dissolving Stubborn Mineral Buildup
If the aerator won't budge with hand strength alone, it's time to break down what's holding it in place. Your best tool for this isn't in your toolbox; it's probably in your kitchen pantry: plain white vinegar. The acetic acid in vinegar works wonders on limescale and calcium deposits.
Here's what you do:
- Soak a small rag or a couple of paper towels in white vinegar.
- Wrap the saturated cloth tightly around the aerator, making sure it covers the threaded area.
- Secure it in place with a rubber band and just let it sit for at least 30-60 minutes.
This "vinegar soak" gives the acid enough time to work its way into the threads and dissolve those stubborn mineral bonds. When you come back and try again, you should find it much easier to turn.
Once that mineral seal is broken, the process is straightforward.
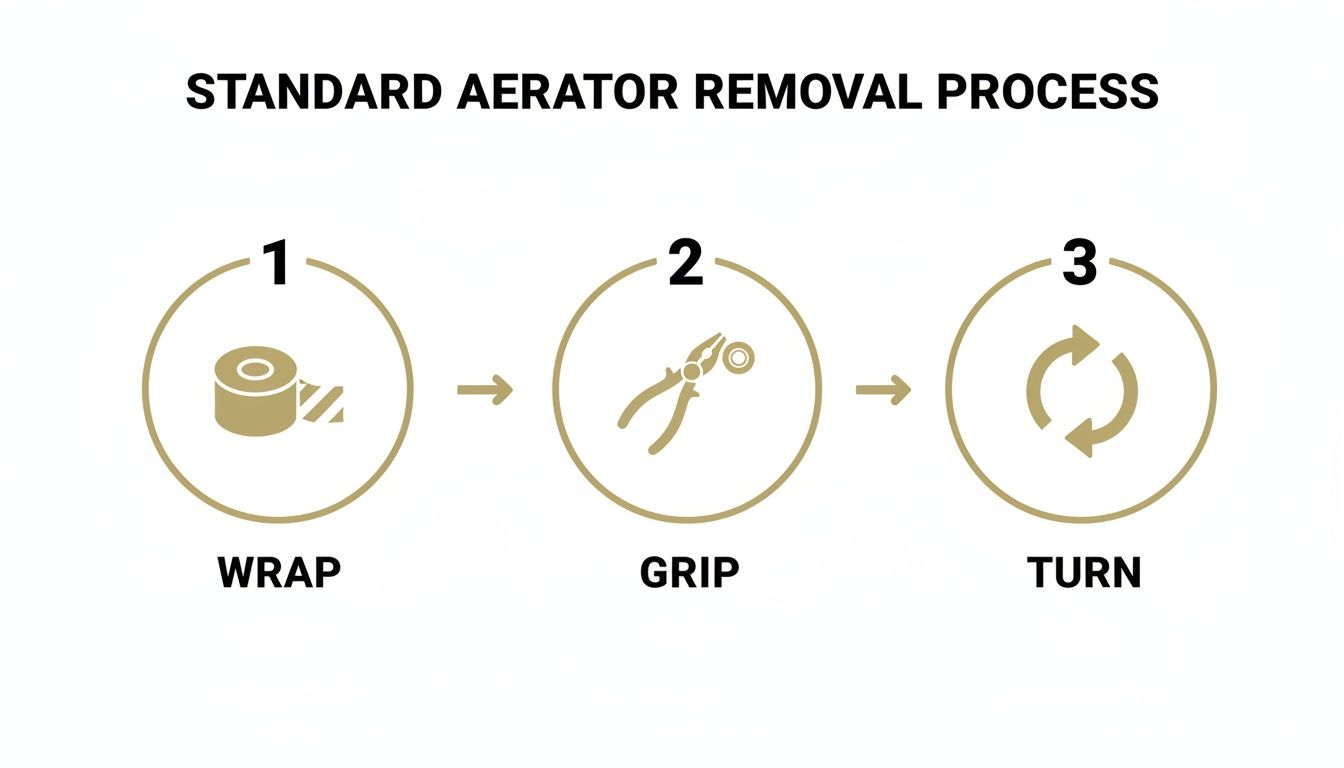
The key is always to protect the finish, get a firm grip, and apply steady, counter-clockwise pressure.
Dealing with Hidden Cache Aerators
Many modern faucets, especially those with sleek, minimalist designs, use what are called cache aerators. These are recessed completely inside the spout, so there's nothing on the outside to grab onto. You won't be able to get them out with pliers or a wrench.
Countless times, people take a flathead screwdriver or a knife to a cache aerator, trying to pry it out. This almost always ends in a shredded plastic aerator and, even worse, damaged threads inside an expensive faucet. Don't do it.
These hidden aerators require a special tool called an aerator key. Your faucet should have come with a small plastic one, but they are incredibly easy to misplace. Thankfully, you can find universal aerator key sets online or at any hardware store. They come with several sizes to fit different brands.
Just find the key that fits the notches inside your spout, insert it, and turn counter-clockwise. It gives you the perfect leverage to unscrew the aerator without any risk of damage. It’s a must-have little tool if you have modern fixtures in your home.
Getting Your Aerator Clean and Back in Action
Now that you've got the aerator off, it's time to get it working like new again. The goal here is to get rid of all that gunk and mineral buildup that’s been messing with your water pressure.
Most aerators come apart into a few pieces—usually the outer housing, a little rubber washer, and the mesh screen assembly. Lay them out on a towel and take a mental picture of how they fit together. Getting this right on reassembly is key.
The Old-School Vinegar Soak
You don't need fancy chemicals for this job. Plain old white vinegar is your best friend for dissolving the limescale and calcium that clogs these things up. Its natural acidity does all the heavy lifting.
Here’s the process that works:
- Get a small bowl and pour in enough white vinegar to completely cover all the parts.
- Let everything soak for at least 30 minutes. If it looks like it’s been a while since the last cleaning, leaving it for an hour won’t hurt.
- Time to scrub. Grab an old toothbrush or a small utility brush and gently scrub the mesh screens and housing. The mineral gunk should come right off.
- Rinse it all off with warm water. Hold the screens up to a light source to make sure every single one of those tiny holes is clear.
This simple vinegar trick is a cornerstone of basic plumbing maintenance. The rising popularity of DIY fixes like this has even fueled growth in the market for specialized aerator tools.
A Pro Tip: The most common mistake people make is messing up the washer placement. That little rubber ring is what prevents leaks. Make sure it's sitting perfectly flat inside the housing before you put it all back together. If it's crooked, you’re guaranteed to have a drip.
Once everything is clean and dry, just reassemble the parts in the reverse order you took them apart.
Start by threading the aerator back onto the faucet by hand, turning it clockwise. When it feels snug, give it one final, gentle quarter-turn with your protected pliers or key. That’s it. You don't want to crank it on too tight, or you’ll be fighting with it all over again next time.
Your Top Faucet Aerator Questions Answered
To wrap things up, let's go through a few of the questions people often ask when tackling this project for the first time. Getting these answers straight can save you a lot of guesswork and help you keep your faucet running like new.
How Often Should I Really Be Cleaning My Aerator?
For most homes, a good rule of thumb is to clean your aerators about every six months. This is usually enough to prevent any serious mineral buildup and keep the water flowing nicely.
But that's just a starting point. If you live in an area with hard water, you’ll probably notice that flow slowing down much sooner. For homes with hard water, checking it every three to four months is recommended. Staying ahead of the buildup is far easier than trying to break through a solid mineral clog later on.
What if I Break the Aerator Trying to Get It Off?
It happens, especially with older, corroded fixtures. Sometimes the plastic housing cracks or the threads get stripped as you're trying to muscle a stuck aerator free. If you find yourself in that situation, don't try to salvage it—the best move is to simply replace the whole thing.
Just take the broken pieces with you to the hardware store. The folks there can help you find a perfect match. Pay close attention to the size, thread type, and the GPM (gallons per minute) flow rate.
It's tempting to just eyeball it, but getting the wrong size is a guaranteed recipe for a leaky, sputtering faucet. Matching the GPM is also important for making sure your faucet works as intended and meets local water-saving standards.
Is It Possible to Get This Thing Off Without Any Tools?
Sometimes, you can get lucky. If the aerator is relatively new and wasn't cranked on too tightly, you might be able to unscrew it by hand. Grabbing a rubber jar opener for a little extra grip can also do the trick.
More often than not, though, you're going to need some kind of tool. After months or years of water pressure and mineral deposits, that aerator forms a stubborn seal that’s almost impossible to break with just your fingers.
For fixtures that combine flawless performance with sophisticated design, explore the curated kitchen and bathroom collections from GRANDJOY.


Leave a comment
This site is protected by hCaptcha and the hCaptcha Privacy Policy and Terms of Service apply.